Ingredients
- 1/2 cup heavy cream
- 2 tablespoons confectioner (AKA powdered) sugar
- 1/2 teaspoon vanilla extract (or any flavoring of choice)
Instructions
- For Best Results: place your mixing bowl (either sturdy glass like Pyrex, ceramic, or stainless steel) and beaters in the freezer to chill for 15 minutes or longer.
- When making whipped cream, combine the chilled heavy cream, sugar, and vanilla extract in your bowl. Start whipping with a handheld mixer at low speed and increase to medium (be patient, and don’t go up to high speed).
- Continue whipping until the cream increases by nearly double. It might seem like you’re not doing much for a while, but the whipped cream will progress fairly quickly through stages.
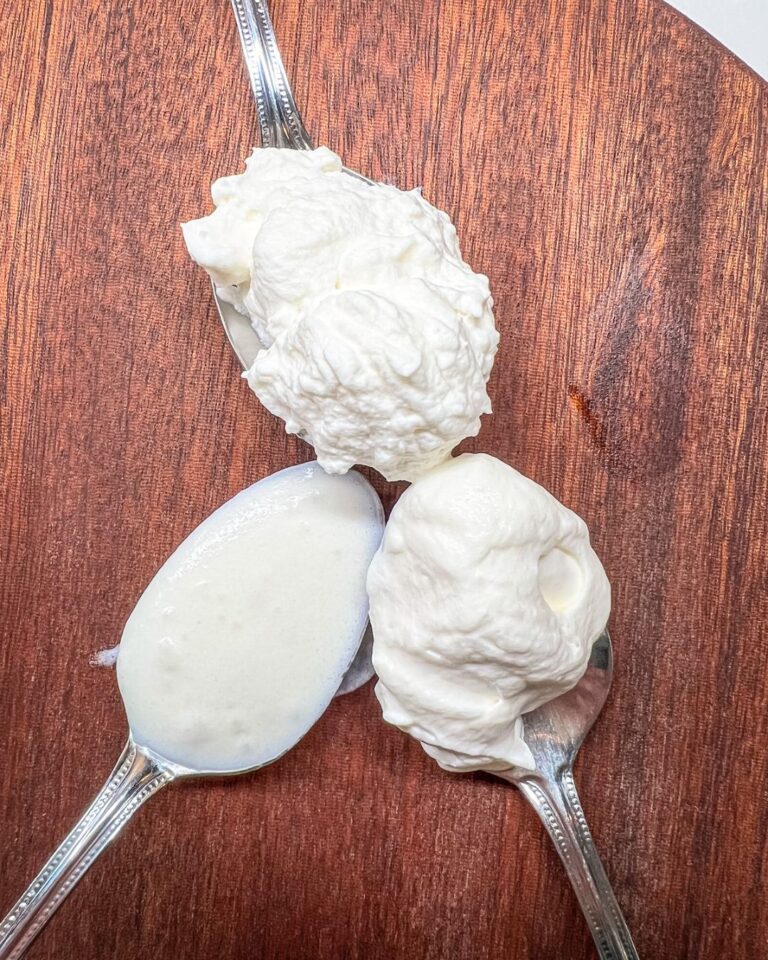
- For soft peaks, continue blending until the mixture resembles melted ice cream and retains light swirl marks when you lift the mixer. For medium peaks, continue blending until the mixture retains a more significant, closer-together swirl mark when you lift the mixer (if you scoop it with a spoon, it will mostly retain those swirl marks on the spoon), This is the classic consistency that you would see dolloped on desserts and what I recommend for making ahead. For stiff peaks, continue blending until the mixture has tight swirl marks and resembles Cool Whip (you could ice a cake with this texture). This is great for hot drinks and piping, but don’t overdo it, or your cream will start turning into butter!
- Use whipped cream as desired.
Notes
Whipped Cream Tips
Whipped cream is truly so easy to make. Here are a few tips before you get started:
- Whipped cream doubles in size. So, if you use 1 cup of heavy cream, you’ll end up with about 2 cups of whipped cream. You can divide or multiply the amount of heavy cream to get your desired quantity of whipped cream (but, making extra is never a bad idea).
- Equipment options: I personally love using my hand mixer (affiliate link) to make whipped cream. Mainly because I hate lugging out my heavy stand mixer for small amounts like this. You can also use an immersion blender or whip it together by hand, if you’re looking for an arm workout, no seriously, by hand is an arm workout. If you really want to try it, Bon Appetit has a video for you to check out.
- Start chilled. At the very minimum, your heavy cream needs to be chilled. However, the whipped cream will whip up faster, and better if your bowl and beaters are chilled as well. Use a tempered glass, ceramic, or stainless steel bowl so it retains the cold temperature (plastic & melamine bowls will not).
- The only ingredient you really need is heavy whipping cream. To make it taste like the whipped cream you know and love, I recommend adding a tiny bit of your sweetener of choice and vanilla.
- Pay attention. When you first start blending the mixture, it might not seem like you’re doing much. Then the whipped cream will start progressing from soft peaks to medium to stiff peaks fairly quickly. You’ll learn more about the differences between those textures below.
- Choose (and Incorporate) Your Sweetener Wisely My personal whipped cream sweetener of choice is confectioner’s sugar. It’s ultra-fine; so it dissolves into the cream quickly. Also, the small amount of cornstarch in the sugar helps stabilize the cream, keeping it pert and perky. You can absolutely use regular granulated sugar in your whipped cream, but add it before you begin to beat so it can properly dissolve into the cream. Read the next line for other great options
- Not a fan of white sugar? Alternative ways to sweeten that work the best are maple syrup or agave; just fold it in gently with a rubber spatula once the cream has already set. Don’t use more than two tablespoons of a liquid sweetener—or any other liquid (like bourbon for a fun adult play on this sweet topping). I don’t recommend date sugar or coconut sugar, because they are made of small pieces of dates/coconut, and try as you might, they just won’t dissolve into the cream, leaving you with a less-than-desirable texture.
You can see examples of soft, medium, and stiff peaks side by side on my blog.
Don’t Be Afraid to Make Whipped Cream in Advance.
There’s no need to sweat up a storm or make your guests or family wait for dessert because you need to furiously whip cream. You can make whipped cream hours in advance but err on the side of under-beating. Store it in the refrigerator and simply bring it back to life with a few whisks before serving.
Here are a few other notes to help with storage:
- Whipped cream will keep well in the refrigerator, covered, for up to 5 days.
- If the mixture has separated, gently whisk it back together with a balloon whisk or fork.
- Homemade whipped cream loses some volume over time, so you may need to lightly whip it again to achieve the original texture.
- Prep Time: 10 minutes
- Category: Dessert
- Cuisine: Universal
Nutrition
- Calories: 473
- Sugar: 19
- Sodium: 33
- Fat: 43
- Saturated Fat: 27
- Carbohydrates: 20
- Protein: 3
- Cholesterol: 134

