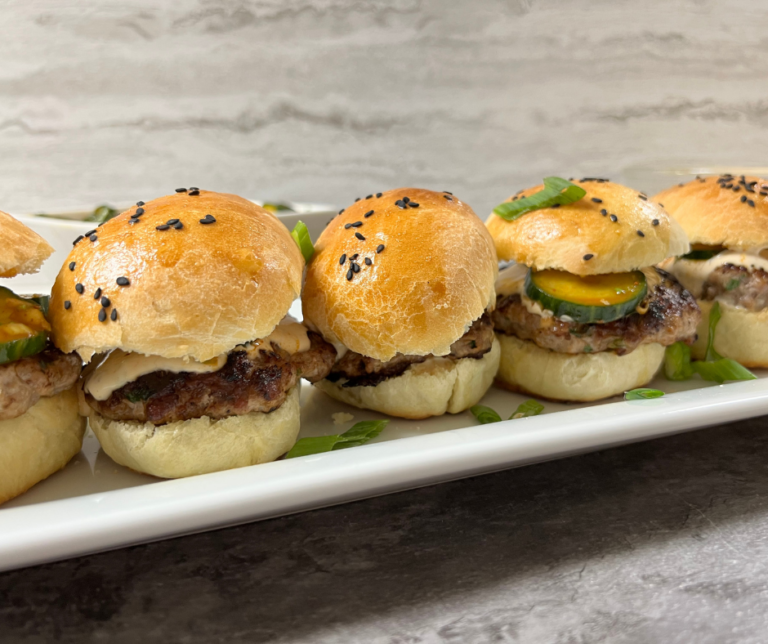
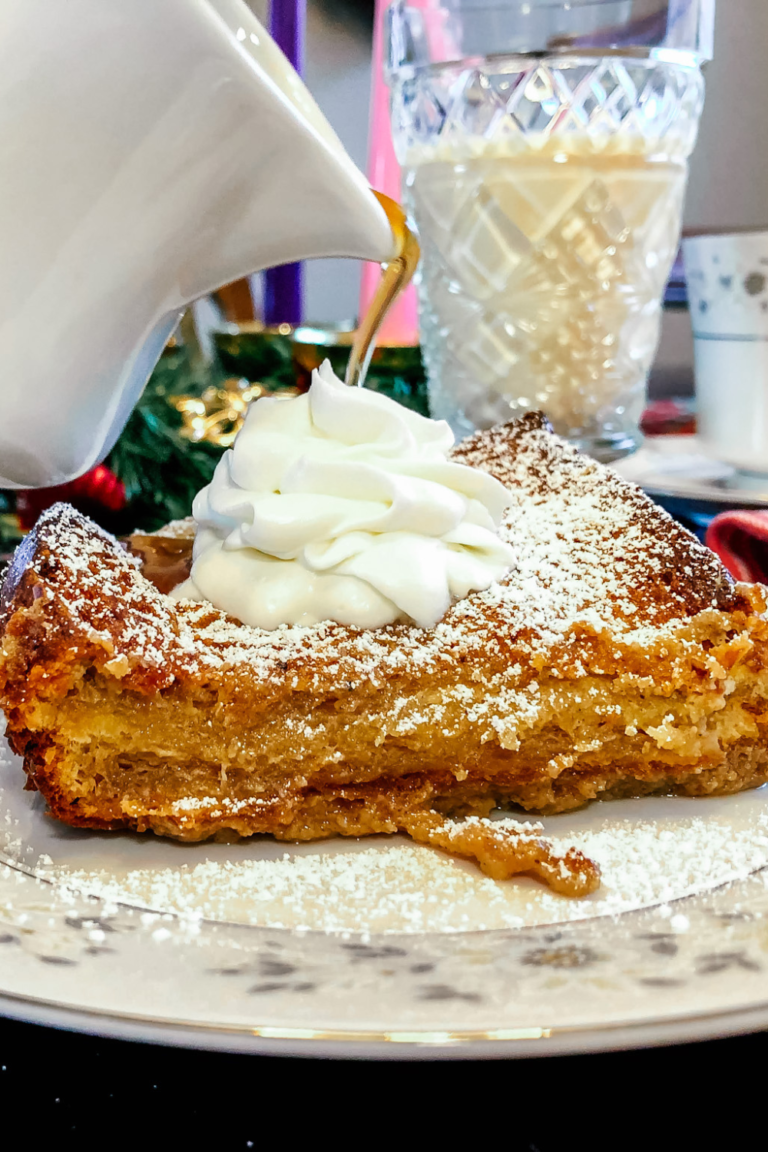
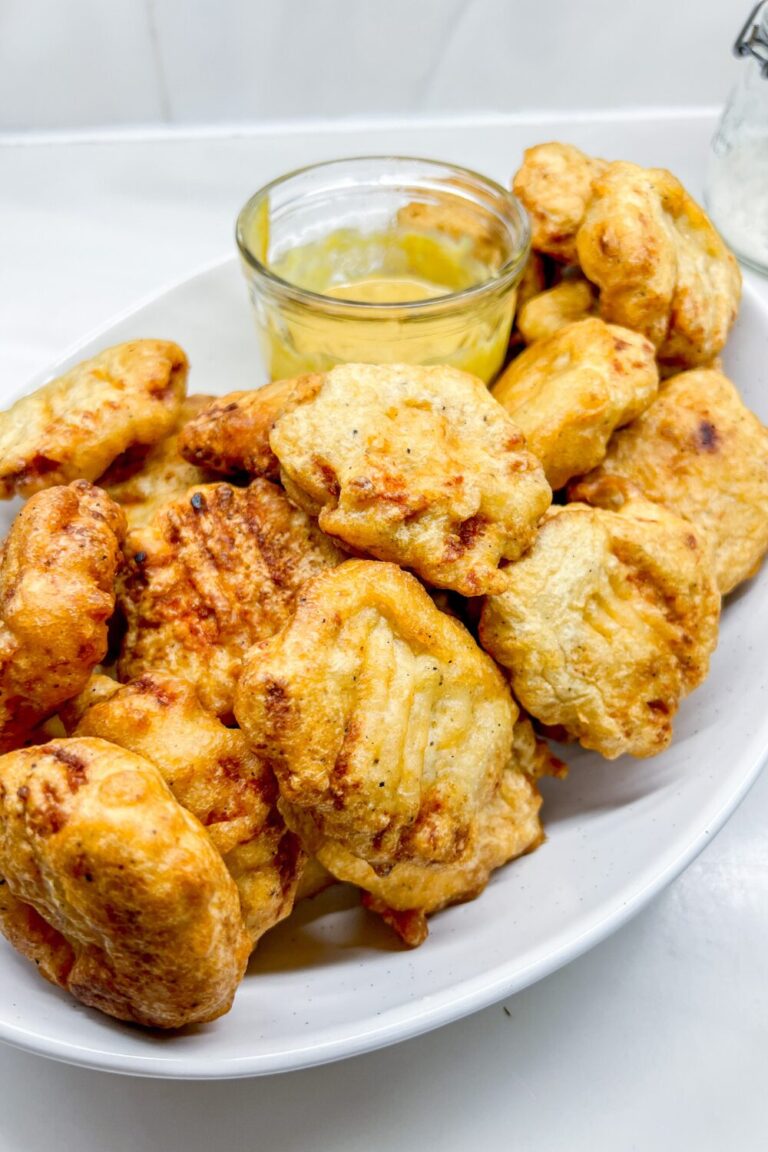
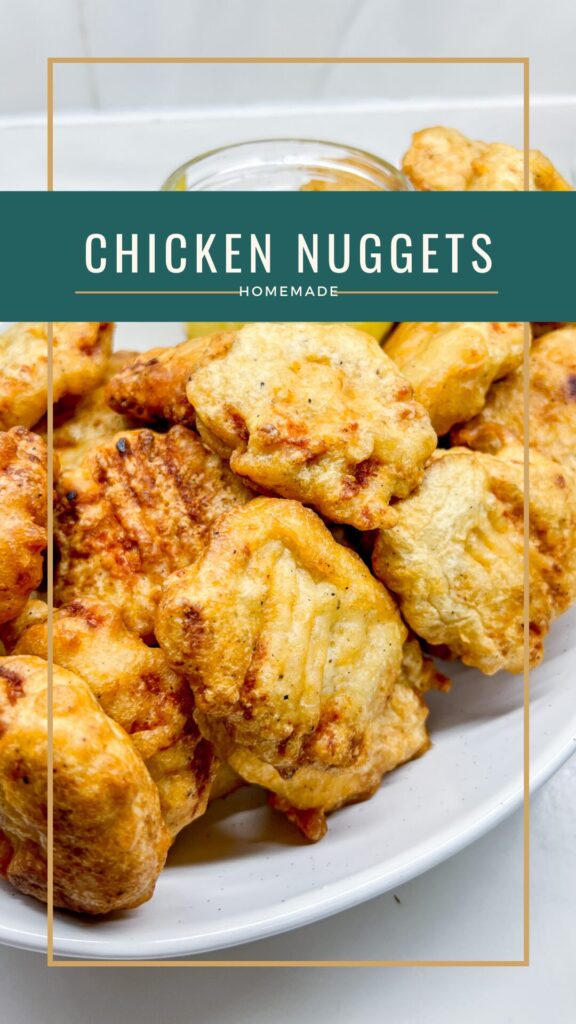
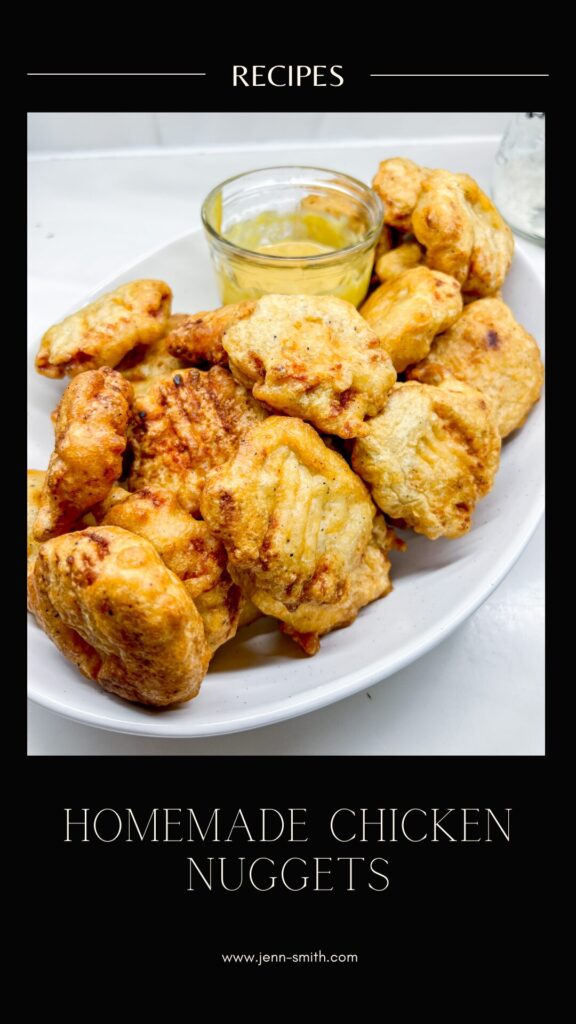
Homemade Chicken Nuggets
This homemade Chicken Nuggets recipe is a true comfort food. It’s soft and tender on the inside, with a crispy golden-brown exterior that’ll make you think you’re eating at a well-known fast-food place. The secret? White meat chicken breast blended with a secret blend of spices and seasonings, and no filler or preservatives allowed.
This Recipe Yields 33 Chicken nuggets
This post may contain affiliate links. That means I may make a small commission on items purchased through links in this post at no extra cost to you! Affiliate Disclaimer

Let’s be real, even when we were kids, the smell of fries and chicken nuggets was an exciting treat to get from that well-known fast food chain. But as a mom now, I’ve become more cautious about the fast food “treats” I give my kids. I also now have a better understanding of why my dad was hesitant (and not always thrilled) to get them for us.
The claim that they’re truly all white meat with just seasonings and no preservatives has me a bit skeptical. So I decided to take my kids’ favorite fast food choice and turn it into something homemade I can whip up virtually anytime. The nuggets themselves can be made ahead of time, making them a convenient option for busy weeknights.
MY LATEST FOOD VIDEOS
CHICKEN NUGGET DETAILS
I wanted this recipe to be a manageable amount of nuggets, just enough for everyone to enjoy. That’s why I chose to use only one pound of chicken, unlike some of the larger recipes I’ve seen.
ABOUT THE INGREDIENTS
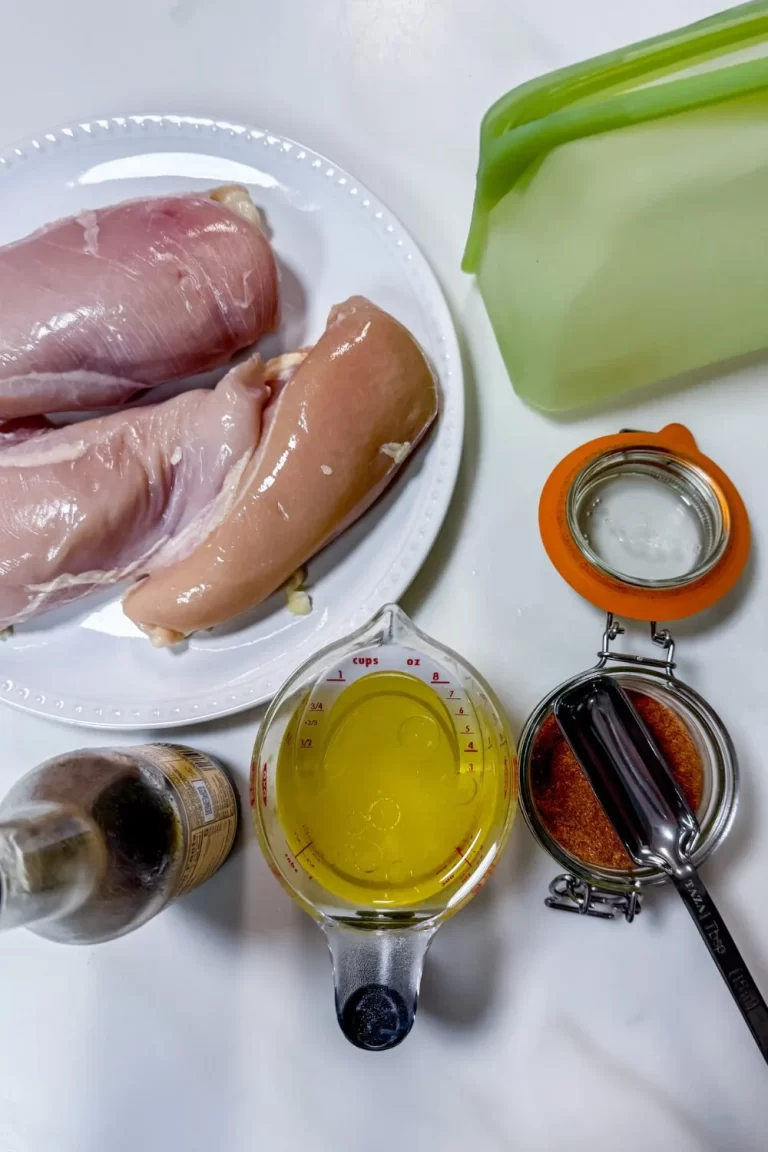
Here’s what you need to make the chicken nuggets.
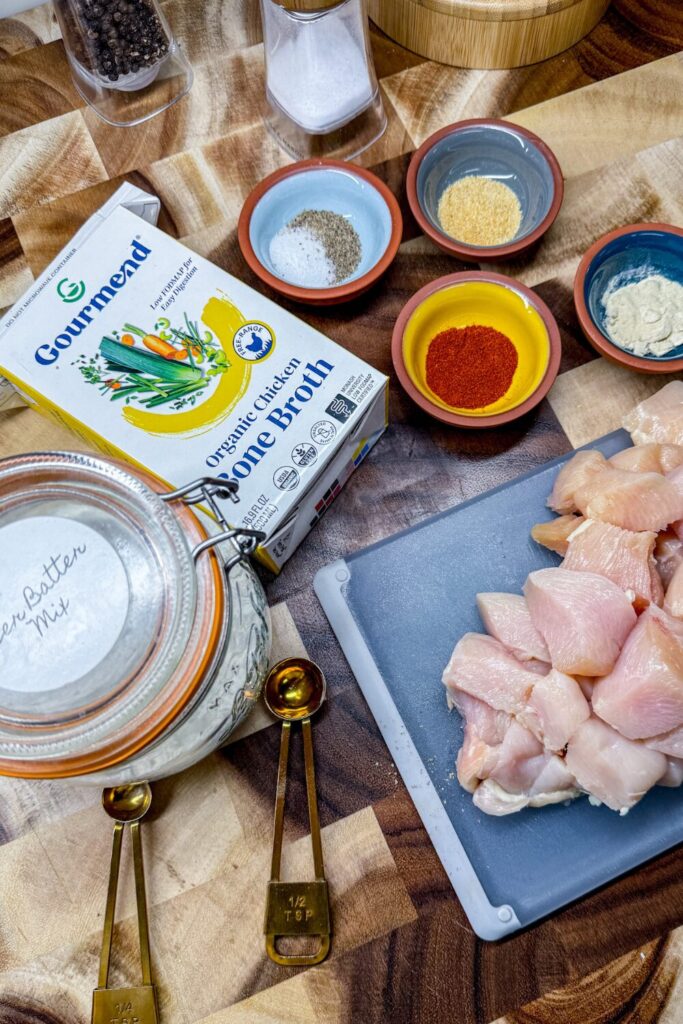
- boneless skinless chicken breasts: I chose this over ground chicken, so I truly want to know what’s in your chicken nuggets. There two ways to grind the meat.
- use a meat grinder attachment on your KitchenAid Stand Mixer to grind boneless, skinless chicken breasts instead of purchasing ground chicken.
- use your food processor to grind the chicken breasts along with your seasonings and breadcrumbs.
- breadcrumbs: The breadcrumbs soak up the milk to create that signature soft meatball. I chose panko because of the surface area. You actually use slightly fewer breadcrumbs vs measuring the same amount of traditional breadcrumbs, creating a much softer, less dense nugget.
- bone broth: brings moisture and flavor to the chicken nuggets
- eggs: the binder for these meatballs.
- garlic and onion powder: I love the flavor both of these add to the chicken.
- paprika: The paprika adds a subtle earthiness, with a sweet and peppery taste to the chicken
- salt and pepper add and bring out flavor.
SUBSTITUTIONS/SUGGESTIONS
- Ground chicken can be used instead of grinding your own chicken. Just know that the ground chicken from the store can sometimes have dark and white meat (it’s usually the scrapes from de-boning the pieces), and in some cases, it has skin in it for a little fay and flavor.
- Breadcumbs can be used instead of panko.
CREATING THE NUGGET
Making chicken nuggets might take a bit of time, but don’t worry, it’s not too hard. Bonus!!! You can even prepare some of these steps ahead of time and have them ready to fry in the middle of the week. Let’s get started!
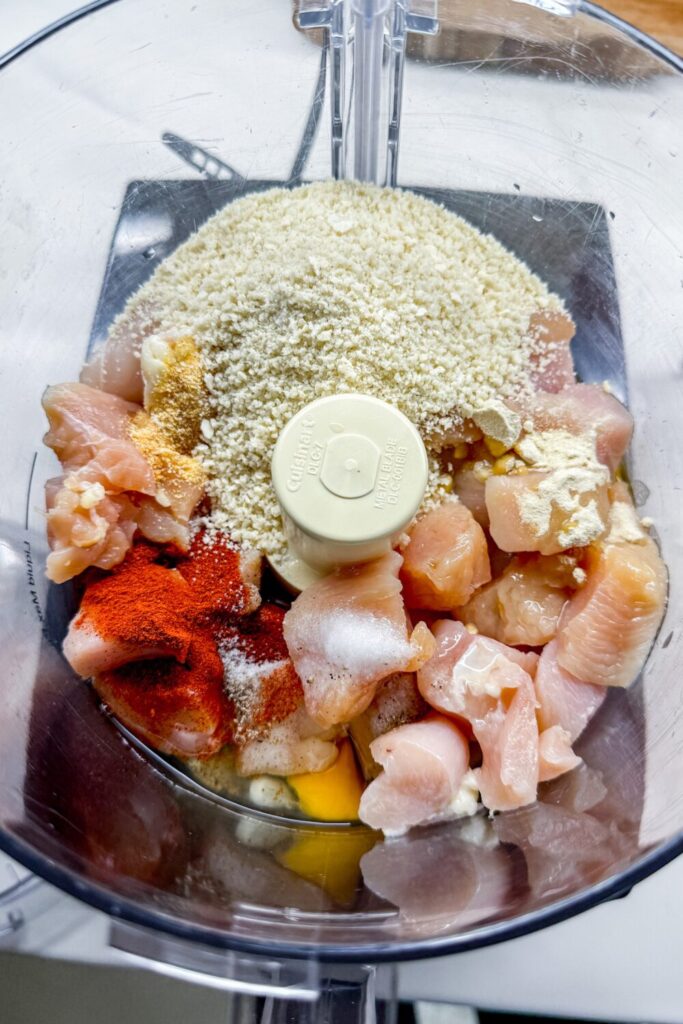
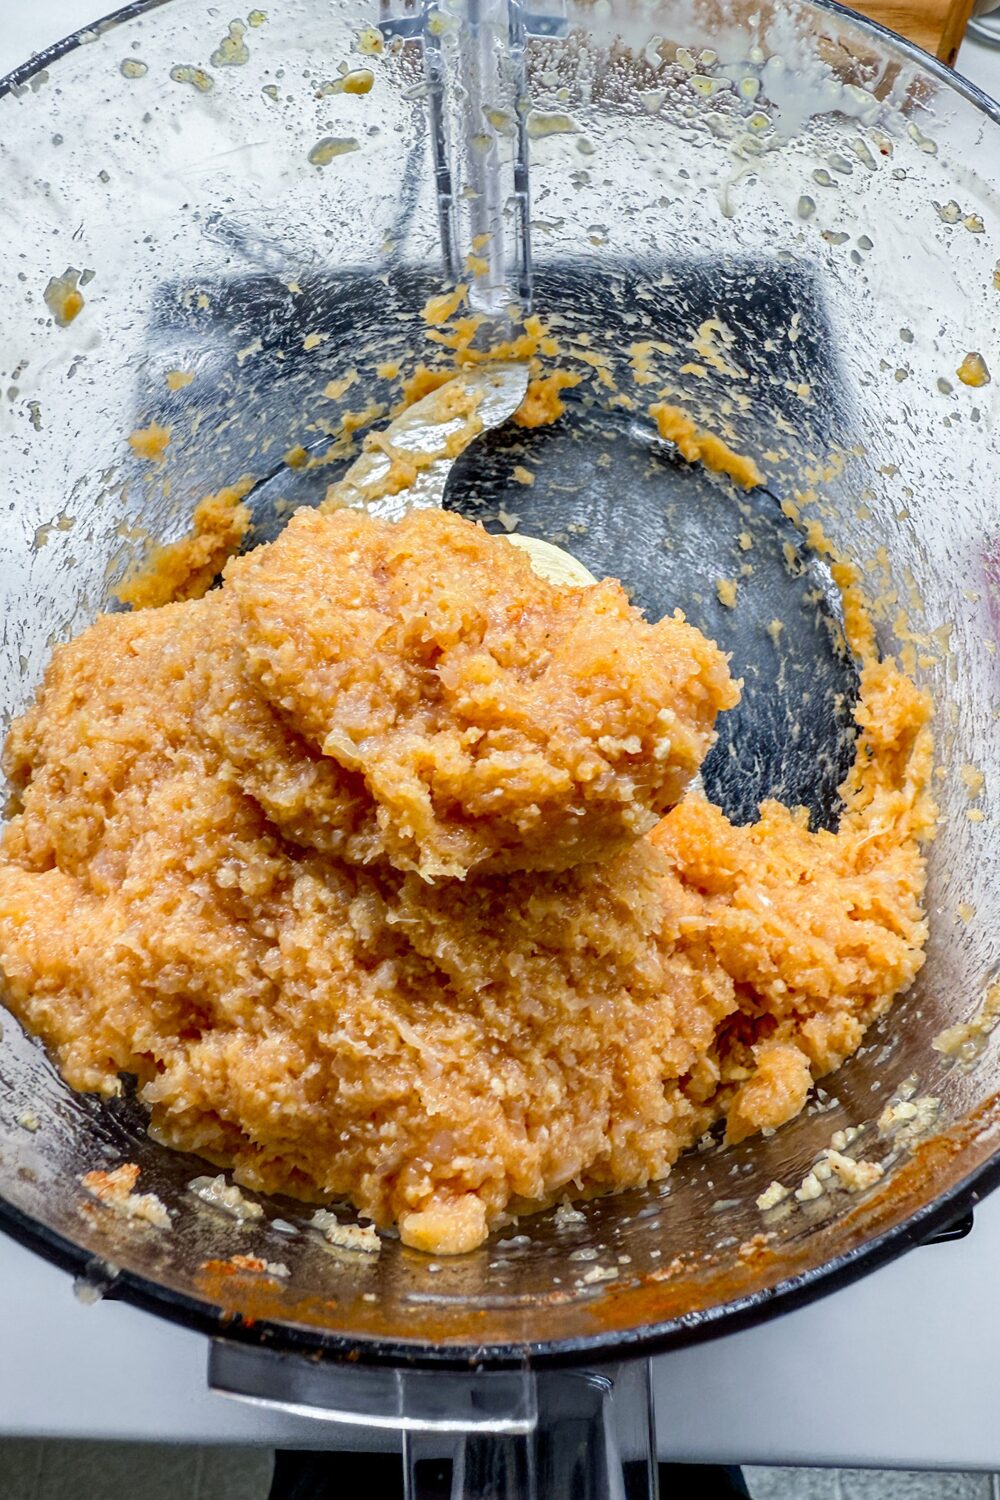
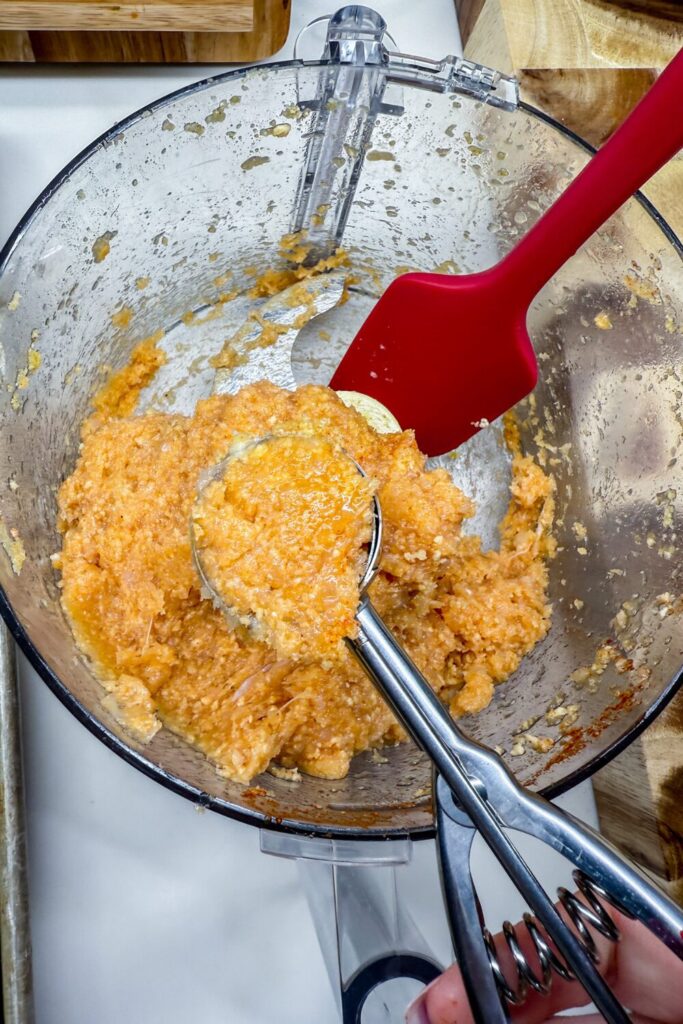
First, grab a medium-small bowl and mix the ground chicken, panko breadcrumbs, chicken bone broth, eggs, garlic powder, onion powder, paprika, sea salt, and freshly ground black pepper. Stir with a silicone spatula until everything is smooth and thick, like a paste.
Or, an easier option, use a food processor to grind the chicken breasts with these ingredients until they’re well combined and have that perfect paste consistency.
JENN’S TIP
- Don’t over-mix the meat. You want to ensure everything is scattered and mixed in but then stop. Otherwise, you’re going to have very tough meatballs.
- To help avoid over-mixing, You can also do everything in a food processor.
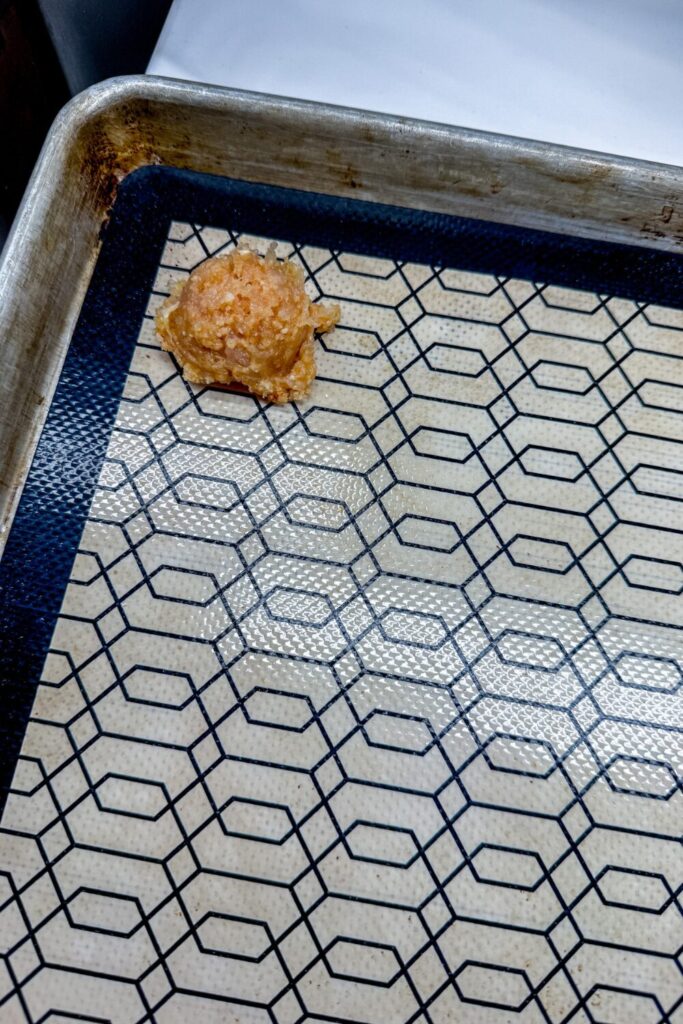
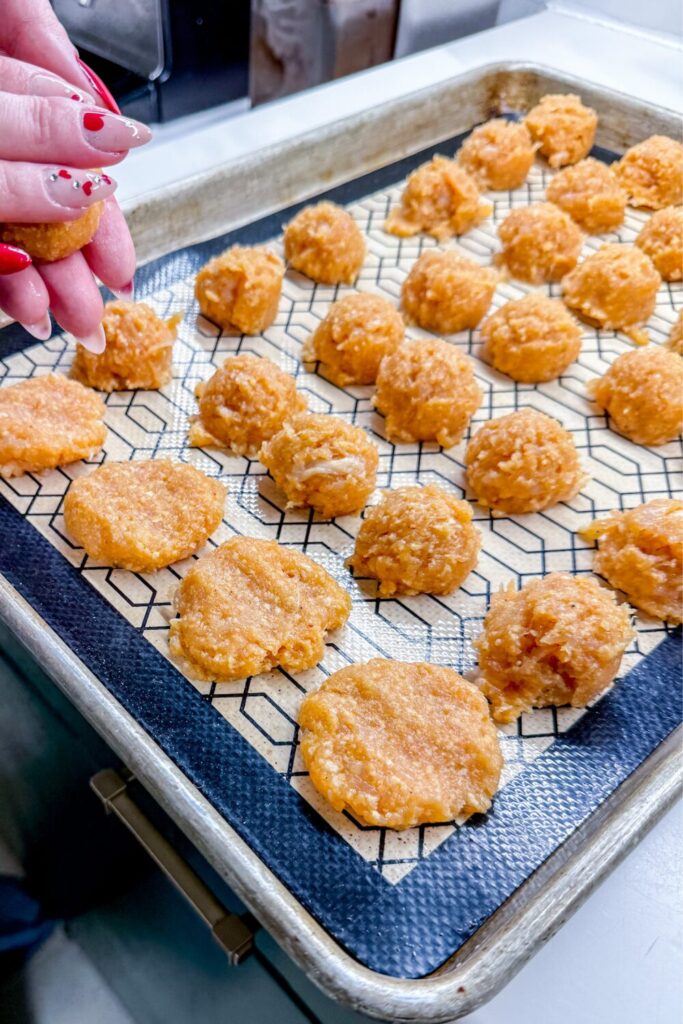
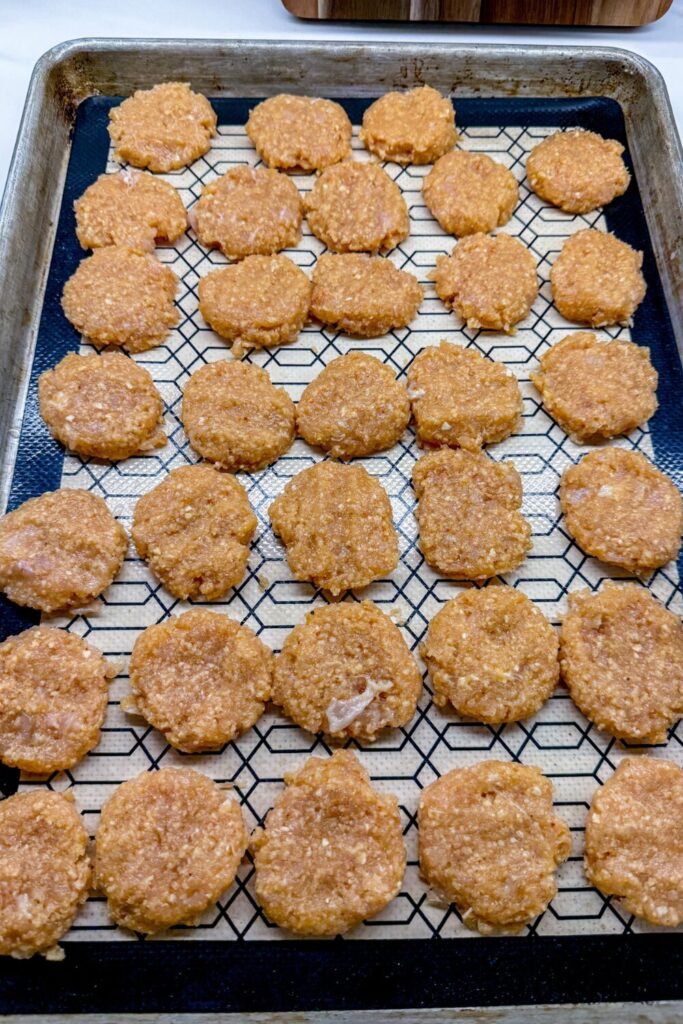
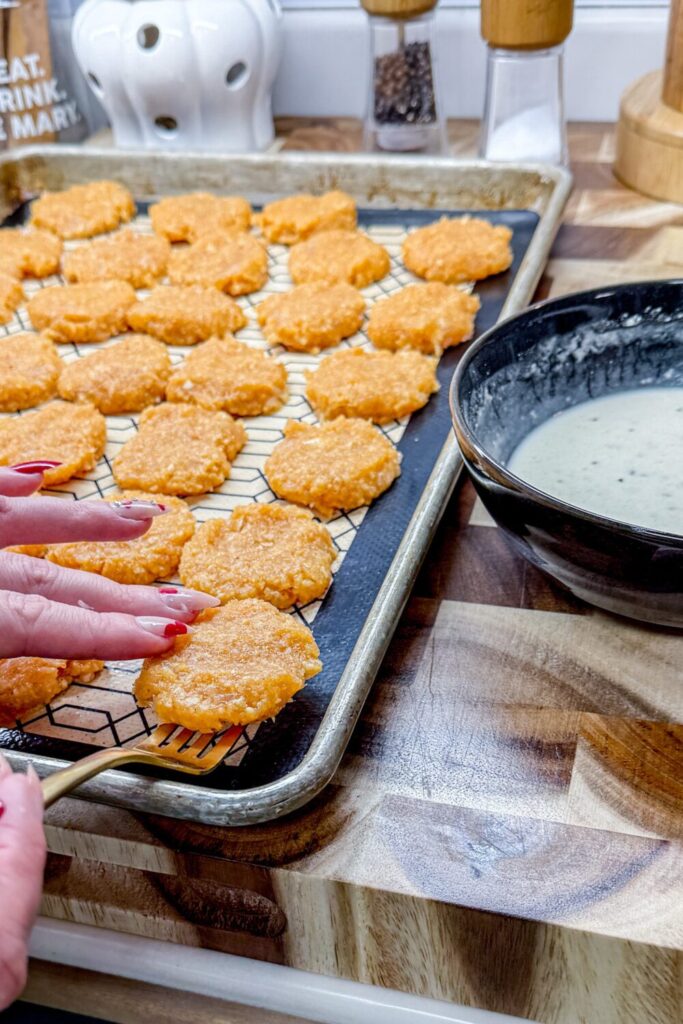
Next, use a one-tablespoon cookie scoop to portion out the meat mixture. Place the scoops on a silicone mat-lined baking sheet or plate.
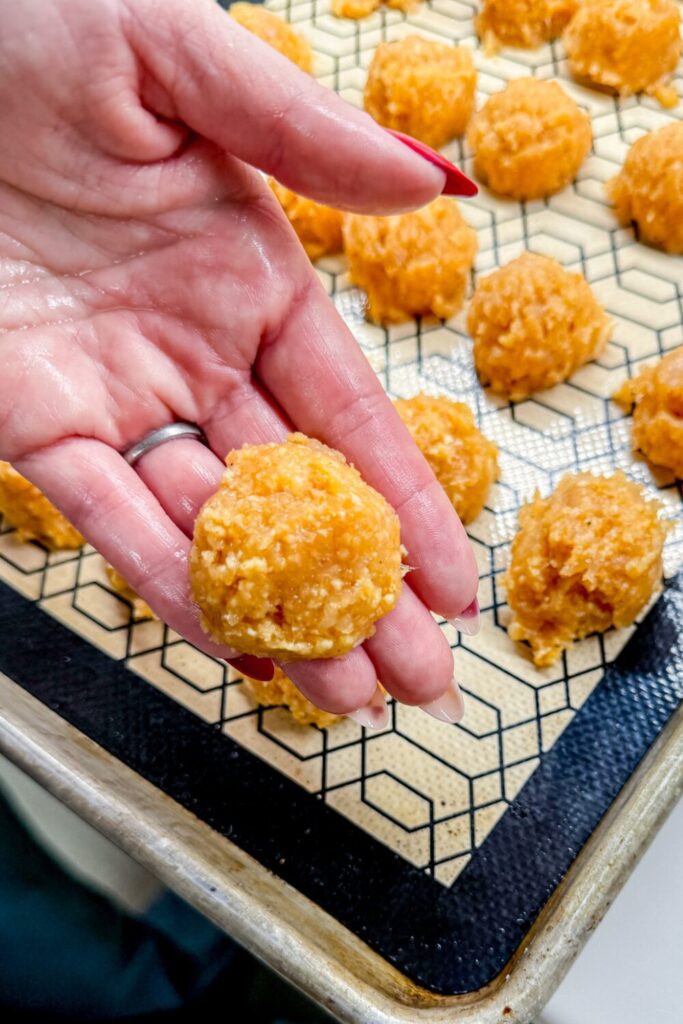
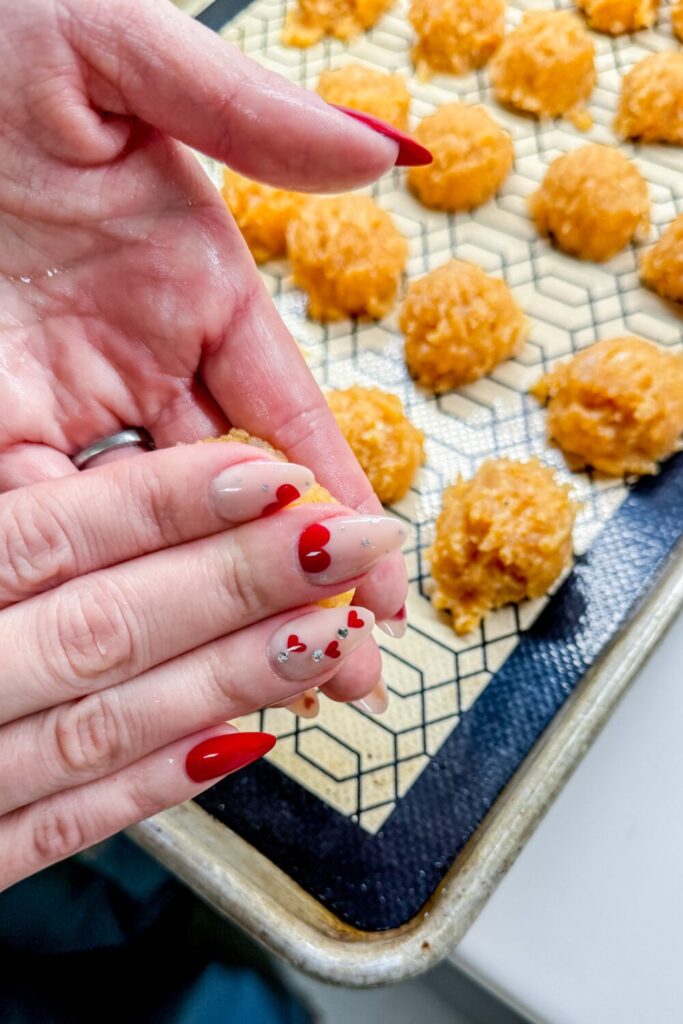
Once you’ve scooped everything, wet your hands and gently shape each portion into a flattened nugget. Set them aside on a parchment-lined sheet pan and repeat until all the chicken mixture is shaped into nuggets.

Using a cookie cutter can be a helpful and fun way to shape your nuggets. Check out my post, Fun & Easy Burger Patties for details.

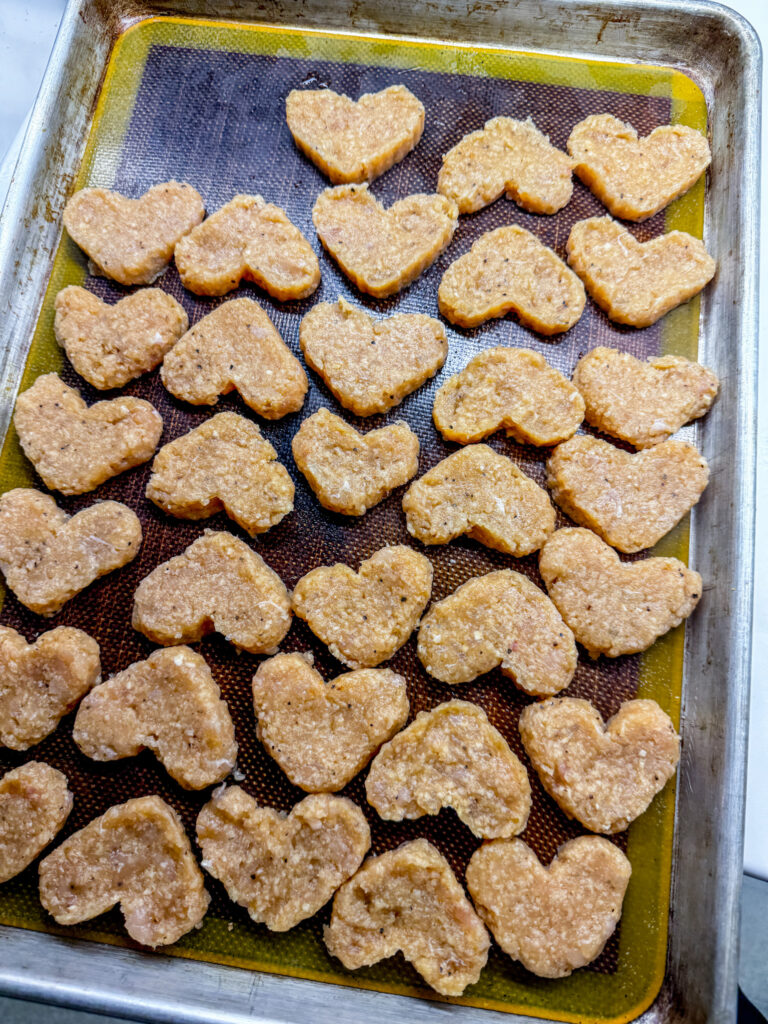
While you’re preparing the beer batter, pop the nuggets in the freezer for about 5-10 minutes. This will help them hold their shape when you fry them.
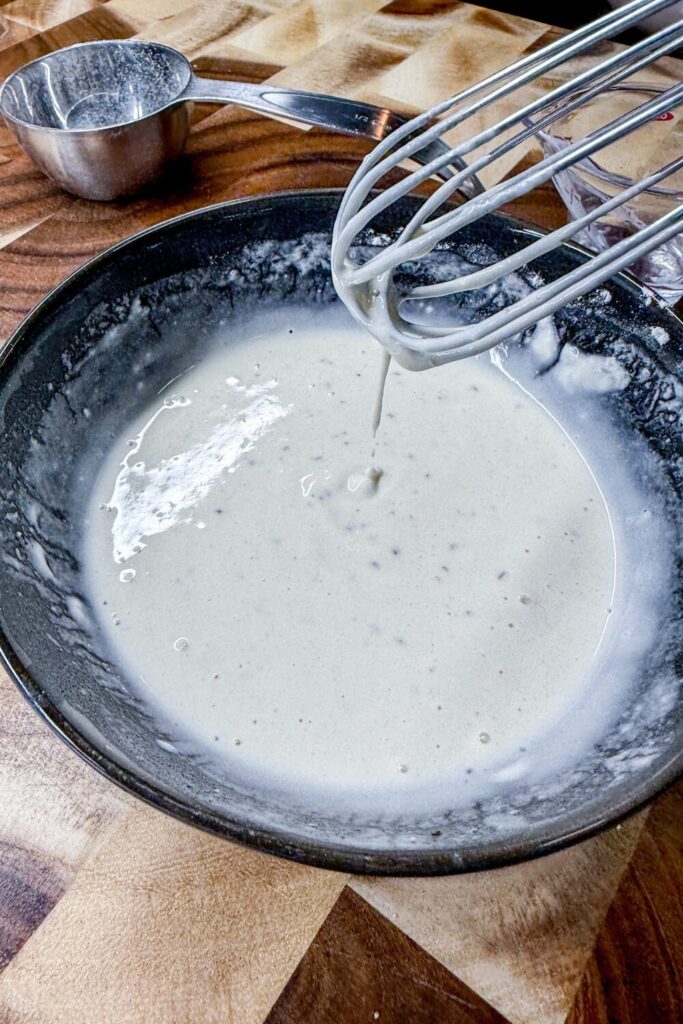
Make the beer batter according to the directions.
JENN’S TIP
- You want a thin light coating, so the batter should be like a thin pancake batter, so you may end up using more liquid than according to the directions.
FRYING THE NUGGETS
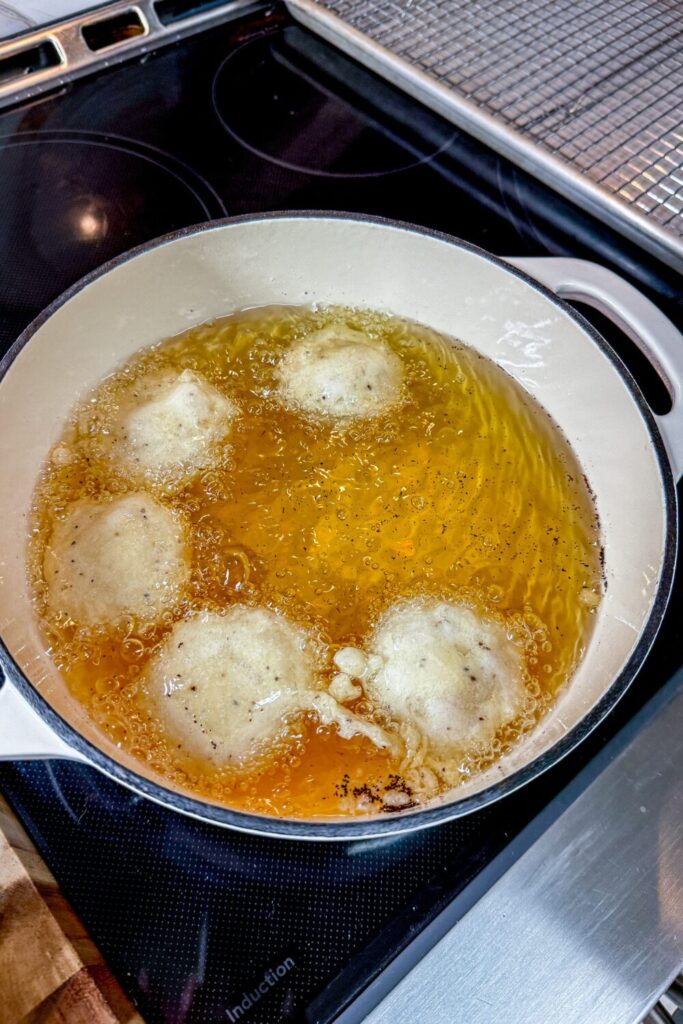
Now, let’s fry! Fill a frying pan with oil, making sure it’s about ¼ to ½ inch deep. Heat the oil to medium-high until it shimmers, reaching around 350°F. The Thermoworks Industrial IR Gun works great for this.
SHOP THS POST

ThermoWorks Industrial IR Gun (IR-GUN-S)
Buy Now →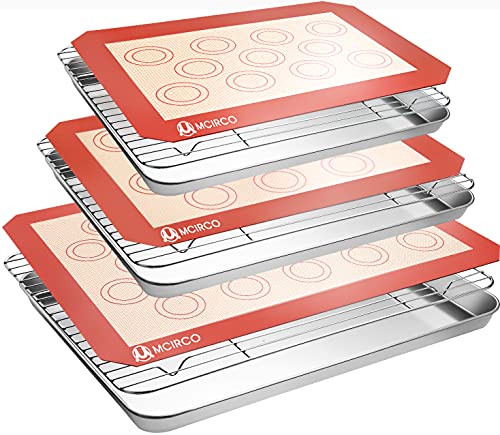
Stainless Steel Baking Sheet Set with Silicone Mats and Cooling Racks (Set of 9)
Buy Now →
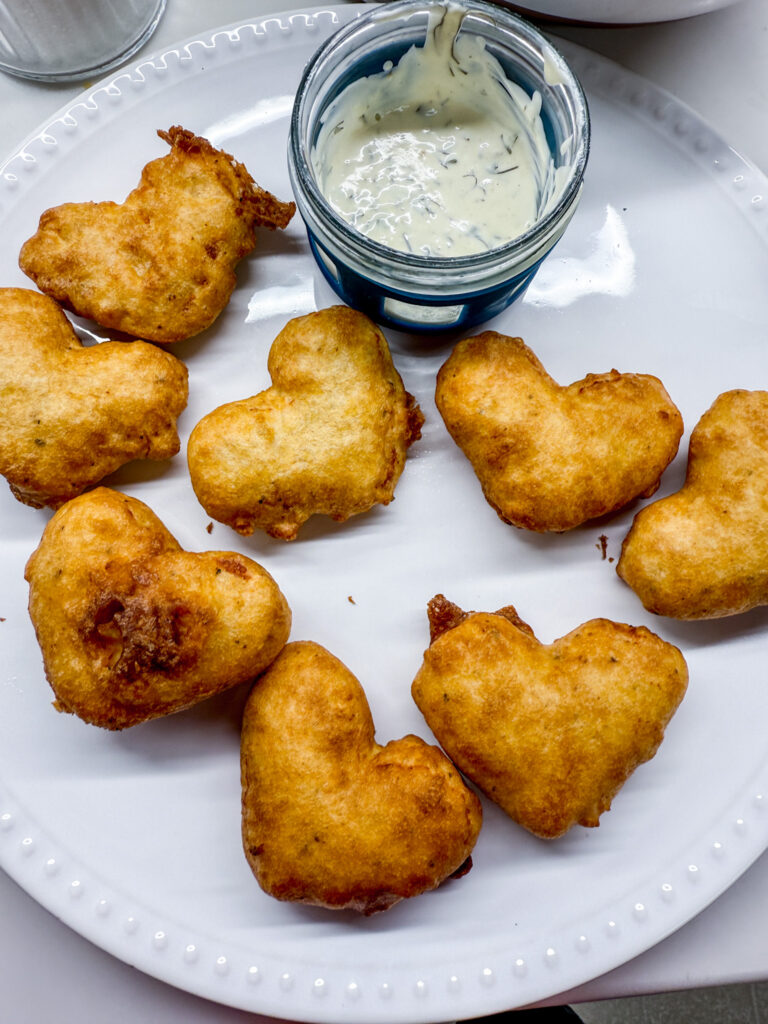
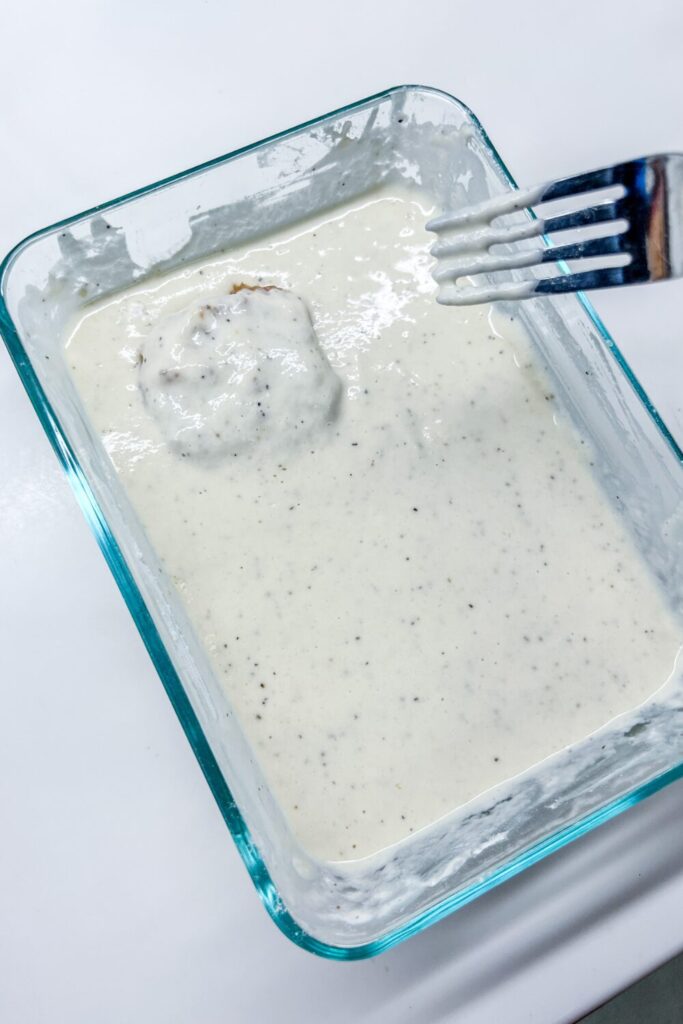
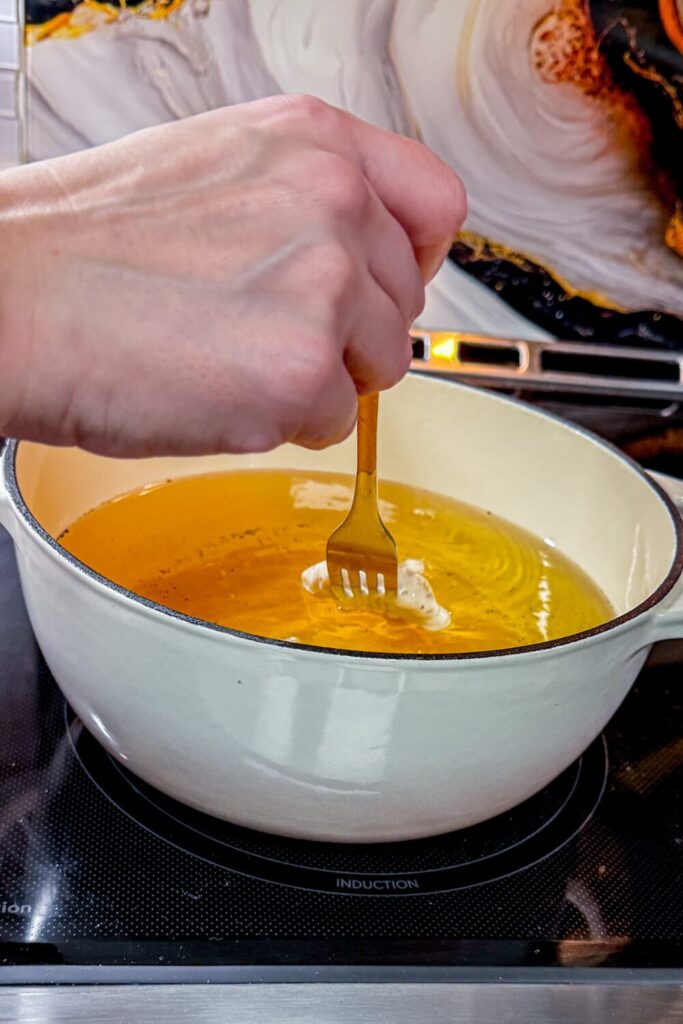
Carefully dip the chilled nuggets into the beer batter using a fork, ensuring they’re completely covered. Gently lower 3 to 4 nuggets into the hot oil. It’s important to fry only a few nuggets at a time to prevent the oil from cooling too quickly and ending up with soggy, greasy chicken nuggets vs. nice, cooked, and crisp nuggets. Cook them for 3-4 minutes per side, turning once to achieve that golden brown color.
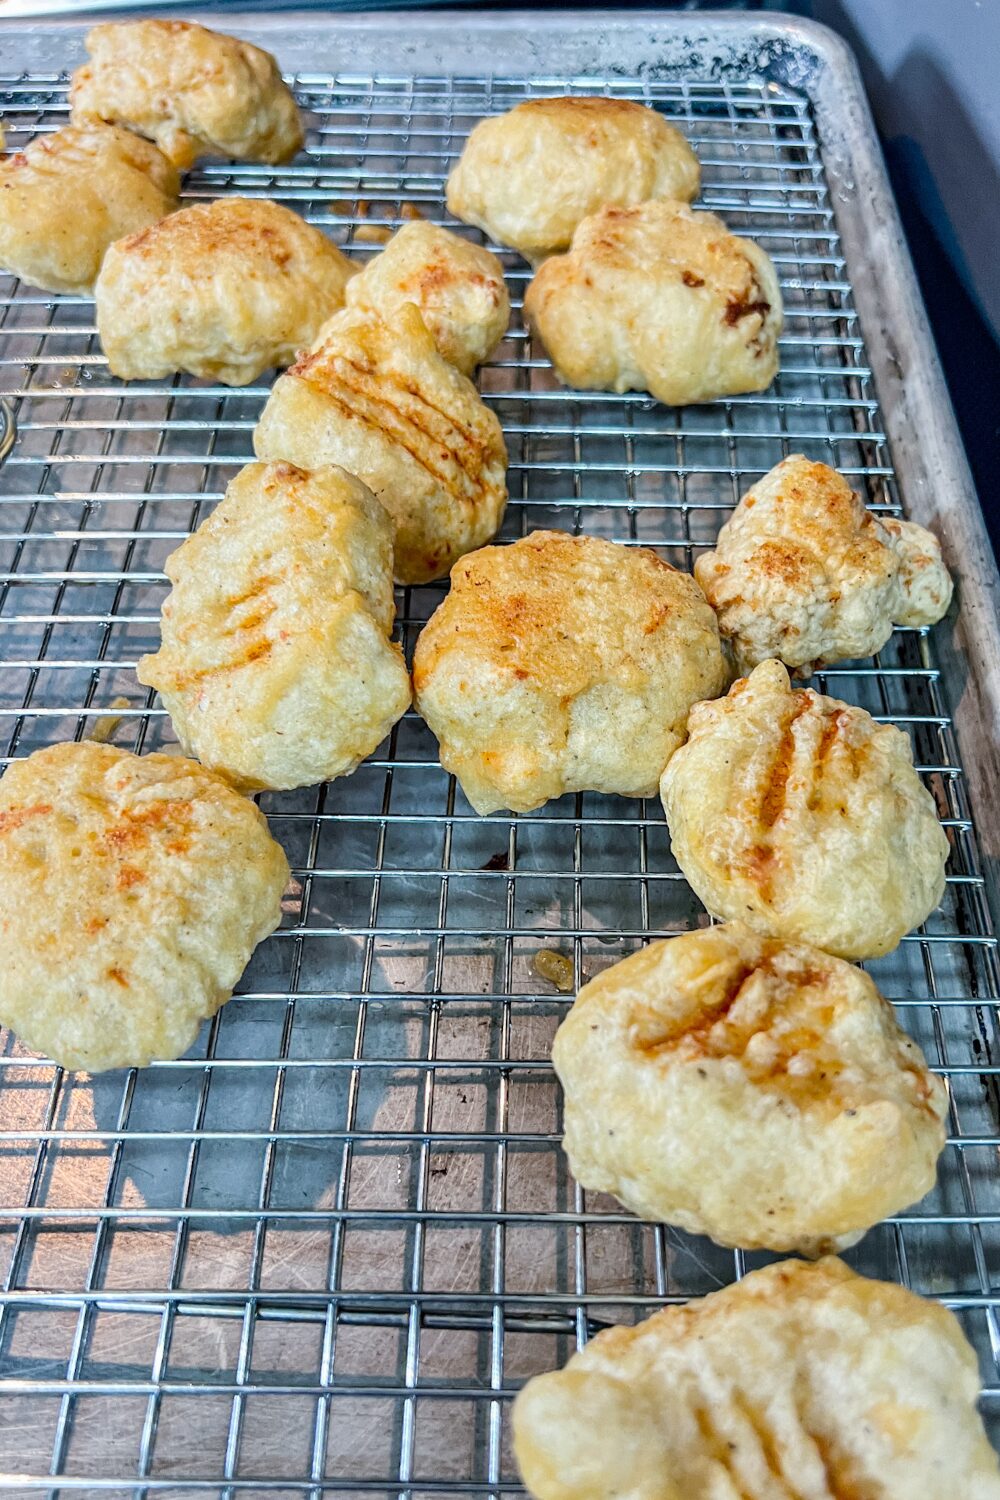
Transfer them to a towel-lined plate or a cooling rack on a baking sheet to drain and cool.
STORAGE DETAILS
Store the chicken nuggets in the refrigerator for a maximum of four days. To reheat, preheat your oven to 350°F and bake the nuggets for 10-15 minutes until they achieve a crispy texture and are heated through.
Cooked chicken nuggets can be frozen for up to three months. To reheat, preheat your oven to 400°F and bake the nuggets for 18-20 minutes until they achieve a crispy texture and are heated through.
Uncoated, raw chicken nuggets can be frozen for up to three months. Before frying, defrost the nuggets in the refrigerator. After defrosting, proceed with the frying instructions as outlined.
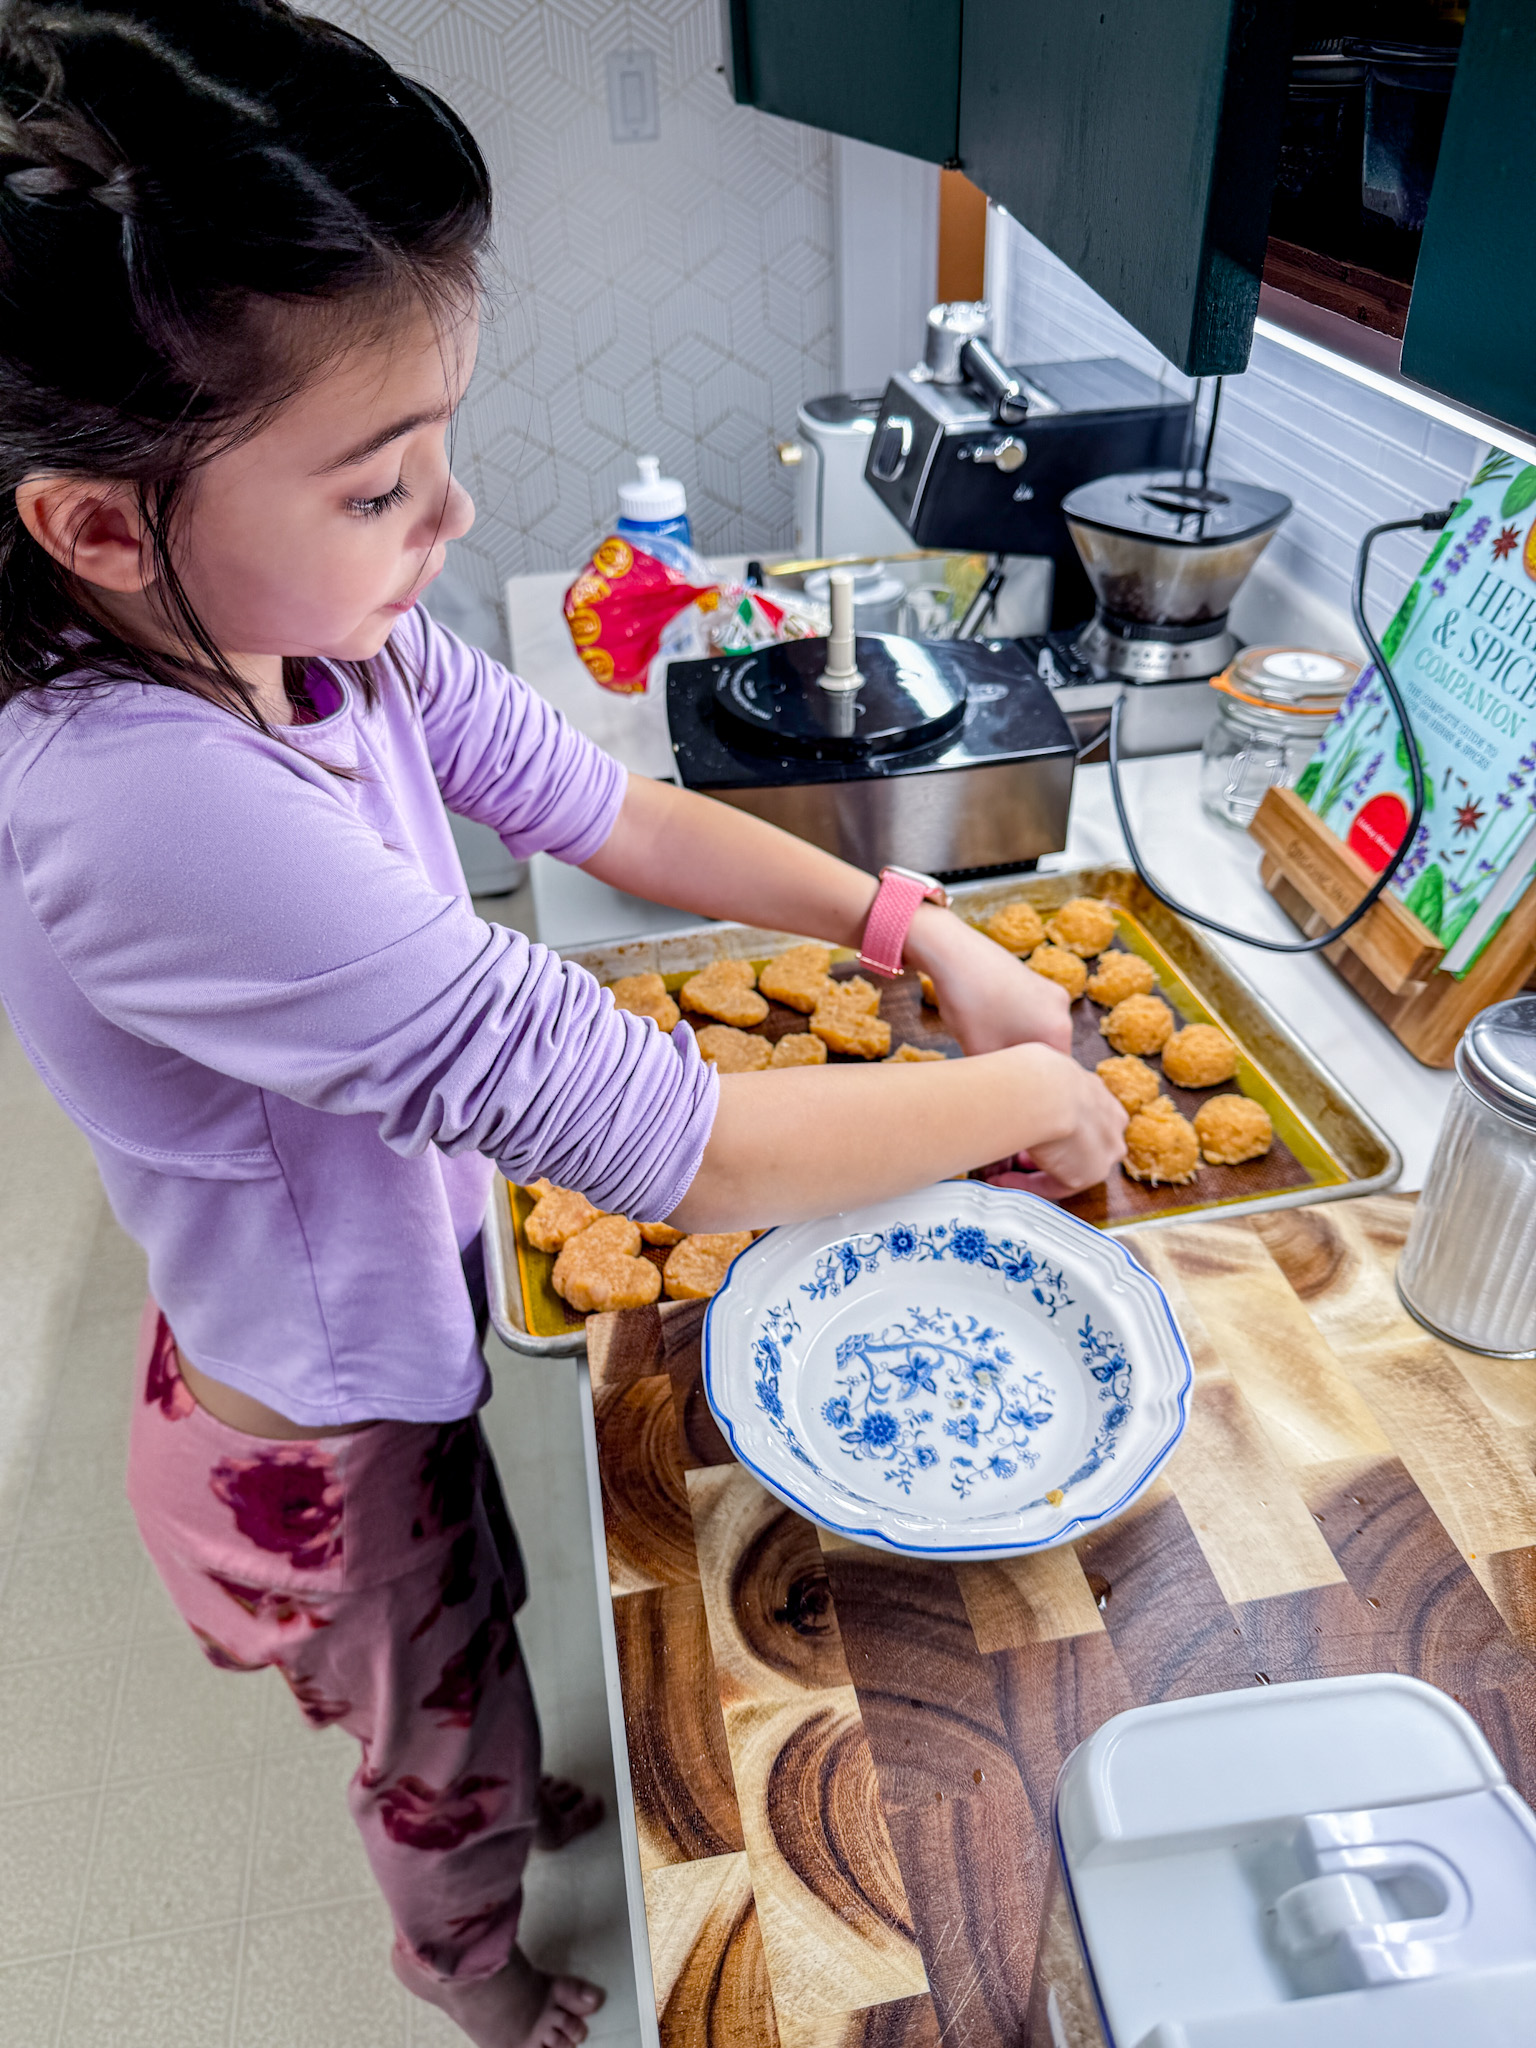
COOKING WITH KIDS
DISCLOSURE: Please keep in mind that the following tips are general and are meant to be suggestive. I personally use these strategies with my own kids, who are all unique even within my own family of five. Therefore, please regard these as suggestions or ideas. If you feel that your child requires more or less assistance, then go with what you and your child are comfortable with. Ultimately, you know your child best.
NOTE: because this is raw meat, I highly recommend older kids (over age 5) are the ones doing this and you may want food-safe gloves.
ENJOY AND SHARE!
Serve the nuggets warm with your favorite dipping sauces, or try making these delicious options:
Your feedback is important to me! Please let me know what you think of this chicken nugget recipe in the comments and rate this recipe using the star icons. Your input helps me improve future posts and the blog overall, and in the end, it all helps me to help YOU. Thank you!
Don’t forget to tag me on Instagram or Facebook, @jenngiamsmith #JennGiamSmith I will always share your posts on my stories and tag you! You can also share it on this post’s Pinterest Pin! Don’t forget to follow me on Pinterest for a steady stream of recipe (and other) inspiration!
It’s always wonderful to see loved ones coming together over delicious food.

Homemade Chicken Nuggets
This homemade Chicken Nuggets recipe is a comforting treat. It’s soft and tender with a crispy golden-brown exterior. This recipe uses white meat chicken breast blended with a perfect spice blend and no fillers or preservatives.
- Total Time: 1 hour + 10 minutes
- Yield: 33 nuggets 1x
Ingredients
- 3/4 cup panko breadcrumbs (See NOTES 1 for substitutes)
- 1/4 cup + 2 tablespoons chicken bone broth (See NOTES 2 for substitutes)
- 1 lb boneless skinless chicken breasts (See NOTES 3 for substitutes)
- 3/4 teaspoons of garlic powder
- 3/4 teaspoons of onion powder
- 1/2 teaspoon paprika
- 1 egg
- 1 1/2 teaspoons sea salt
- 1/4 teaspoon freshly ground black pepper
- 1/2 batch of made homemade beer batter or store-bought [for crust] 1/2 cup mix + 7tbl water/beer
- Peanut oil [for frying]
Instructions
THE NUGGETS
- In a medium-small bowl, combine the ground chicken panko breadcrumbs, chicken bone broth, eggs, garlic powder, onion powder, paprika, sea salt, and freshly ground black pepper until the mixture achieves a smooth, thick paste-like consistency.
- Alternatively, use a food processor to grind the chicken breasts with the panko breadcrumbs, chicken bone broth, eggs, garlic powder, onion powder, paprika, sea salt, and freshly ground black pepper until well combined and the mixture has a smooth, thick paste-like consistency.
- Using a 1 Tablespoon cookie scoop, portion the meat mixture and arrange the scoops on a baking sheet or plate. Once all are scooped, dip your hands in water and gently shape each portion into a flattened nugget form of your choice, then set aside on a parchment-lined sheet pan. Repeat until all of the chicken mixture has been shaped into nuggets.
- Chill them in the freezer for about 5-10 minutes (roughly the time it should take you to prepare the beer batter).
- Make the homemade beer batter (or store bought)
- When ready to fry, fill a frying pan to about ¼ to ½ inch deep with oil. Heat the oil to medium-high until it shimmers (or when it reaches 350°F).
- Using a fork, carefully dip the chilled chicken nuggets into the beer batter, ensuring they are completely covered.
- Gently lower 3 to 4 of the chilled nuggets into the hot oil. Allow the nuggets to cook for 3-4 minutes per side, turning once to ensure all sides are cooked and turn golden brown. Transfer them to a towel-lined plate or a cooling rack lined on a baking sheet to drain and cool.
- Serve the nuggets warm with your favorite dipping sauces:
THE BATTER
Make the beer batter according to the directions.
Equipment

Le Creuset 6.75 qt. Enameled Cast Iron
Buy Now →
Mora Ceramics Small Mixing Bowls Set of 2 – 2.5 & 1.6 Qt (Vanilla White)
Buy Now →Stainless Steel Baking Sheet Set with Silicone Mats and Cooling Racks (Set of 9)
Buy Now →
Swify Spider Strainer (Set of 3)
Buy Now →Notes
SUBSTITUTIONS
- 1:1 ratio Panko to Plain Breadcrumbs can be used.
- 1:1 ratio chicken bone broth to Vegetable Broth (Use Code: JENNSMITH15 to 15% off at Gourmend)
- 1:1 ratio boneless skinless chicken breast to ground chicken
STORAGE
- Store chicken nuggets in the fridge for 4 days. To reheat, preheat oven to 350°F and bake for 10-15 minutes until crispy and heated.
- Cooked nuggets can be frozen for 3 months. Reheat at 400°F for 18-20 minutes until crispy and heated.
- Uncoated, raw nuggets can be frozen for 3 months. Defrost in the fridge before frying. Follow frying instructions (#3-8 in cooking instructions)
- Prep Time: 20 minutes
- Freezing Time: 5 minutes
- Cook Time: 45 minutes
- Category: lunch, dinner, moderate recipe
- Method: frying
- Cuisine: American
WANT TO REMEMBER THIS POST?
Pin it to your favorite Pinterest Board!
©Photo, Prop Styling, and Food Styling by Jenn Smith
This Blog Post is ©2025 Jenn Giam Smith™; Jenn Smith, LLC; Always Jenn Smith (FKA Smith Country, LLC) See below for details
Please Be Respectful
All rights reserved. You may NOT sell, trade, share or redistribute this recipe in any way or use any of my photographs for your site. If you are linking back to this post to a list of recipes, giving credit for the recipe to myself and my site, you may use ONE photo. You must site me and my blog as the creators of the recipe and give credit for the photo. ©2025 Jenn Giam Smith; Jenn Smith, LLC
Jenn Giam Smith™; Jenn Smith, LLC is a participant in the Amazon Services LLC Associates Program, an affiliate advertising program designed to provide a means for sites to earn advertising fees by advertising and linking to amazon.com. As well as the Apple affiliate program now called the Performance Partners Program.
This site displays third-party ads and contains affiliate links, See terms and conditions for ALL affiliates.
Feel free to comment below or e-mail me directly if you have any questions.
Thank you for visiting!