Granite Cardigan by All About Ami
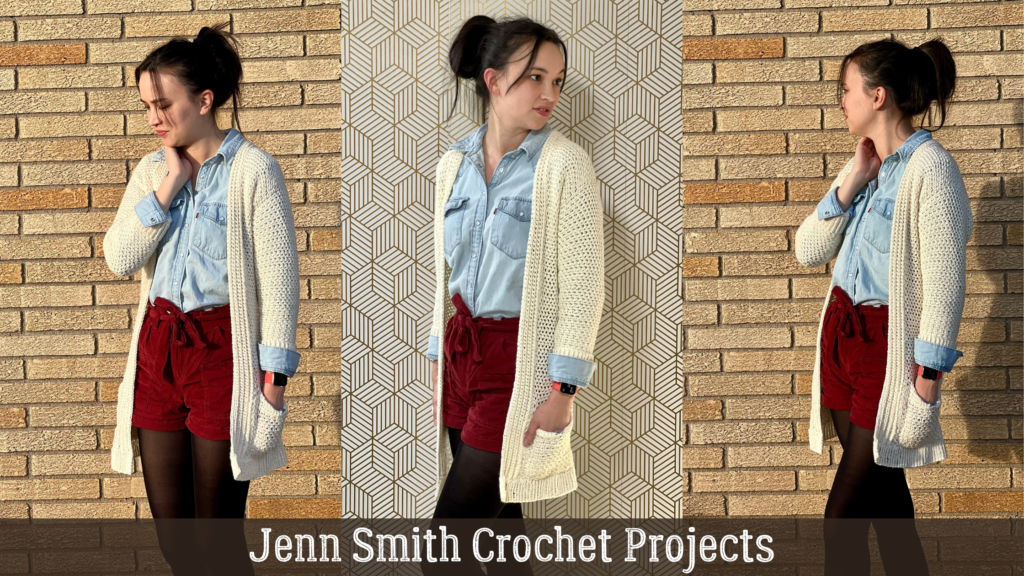
I LOVE a good Cardigan. They’re versatile, some are cozy, others are airy, they always add to an outfit, and are just all-around fun. This Granite Cardigan is Stephanie of All About Ami.
Believe it or not, the Granite Poncho was actually my first encounter with an All About Ami pattern. I don’t usually make little stuffed toys or amigurumi, so when I was looking for a fun and easy poncho pattern, I stumbled onto the Granite Poncho and absolutely loved it! The best part was that I knew I would be able to customize it to create a knit and crochet merge and make it completely my own.
This post may contain affiliate links. That means I may make a small commission on items purchased through links in this post at no extra cost to you! Affiliate Disclaimer
I LOVE a good Cardigan. They’re versatile, some are cozy, others are airy, they always add to an outfit, and are just all-around fun. This Granite Cardigan is Stephanie of All About Ami.
Believe it or not, the Granite Poncho was actually my first encounter with an All About Ami pattern. I don’t usually make little stuffed toys or amigurumi, so when I was looking for a fun and easy poncho pattern, I stumbled onto the Granite Poncho and absolutely loved it! The best part was that I knew I would be able to customize it to create a knit and crochet merge and make it completely my own.
That’s one thing I LOVE about Stephanie’s Patterns. She makes it really easy to adjust and make it work for you. They’re also very easy to follow.

Materials Used
- Yarn: She used New Basic 175 Yarn, which is now discontinued. I used Comfy Cotton Blend Yarn in Whipped Cream These Yarns are actually different weights. The New Basic 175 Yarn is a 4 medium and the Comfy Cotton Blend Yarn is a 3 Light. So keep this in mind when you’re making your sweater. You will want to either hold 2 together or go up a size. More details on this are below.
- Crochet hook: 6.5 mm (K-10.5) Crochet Hook and 4.0mm (G-6) Crochet Hook
- knitting needles: 48” long 4.0mm circular needles

I bought the Clover Takumi Interchangeable Set two years ago and it was the best investment I made so far in my knitting. I highly recommend it if you can afford to swing the price. I did the math on what I was spending on individual-size circular needles and straight needles, plus buying double-pointed needles and this just made the most sense. Especially once I started doing the magic loop technique.
About the Yarn
Choosing the right type of yarn is important when crocheting projects like wearables. Depending on what you’re going for, you’ll want something comfy, and not too heavy. When I saw this sweater, I knew I wanted it to be something that I could wear in spring and wanted to be airy. Enter… Comfy Cotton Yarn. This is a great choice as it is light airy and very soft.

I happened to stumble upon the yarn itself shopping for a different project (shhh), and loved the coloring so much, that I knew I was going to make myself some kind of sweater with it. So I bought I bunch of them. It’s seriously super soft and not like other cotton yarns that can be stiff and really just good for washcloths. The mixture of cotton and polyester is what makes it soft, light, and perfect for this project!

Comfy Cotton Blend Yarn is classified as a level 3-light yarn and there are 200 grams in one skein. You’ll need 3-4 skeins to make this poncho in size small (I used 3 skeins).
I went a little off-script with this…
The Sweater is worked in 3 pieces (back panel and two side panels), and the sleeves are worked up from the ribbing. I did the sleeves in the round using the knit magic loop technique.
Sweater Construction
Sleeves
CO 54
k1X1 twisted for 2.5”
K2tog 4 times, k1, around to the last 7, k2tog 3 times, k1, k1 (31)
Switch to a 4.0mm hook
Sc cast off (31)
Here is a video tutorial showing how to create a knit folded brim in the round, but it also shows the single crochet cast-off method.
Switch to a 6.5mm hook
Continue the sleeve pattern with round 2 but in the round.
To achieve the granite stitch in the round you will need to do the following;


Collar ribbing
I used a 4.0mm hook and I did 9 rows instead of 7. But I followed the pattern for this otherwise.
This took a lot of gauge swatches to figure out.
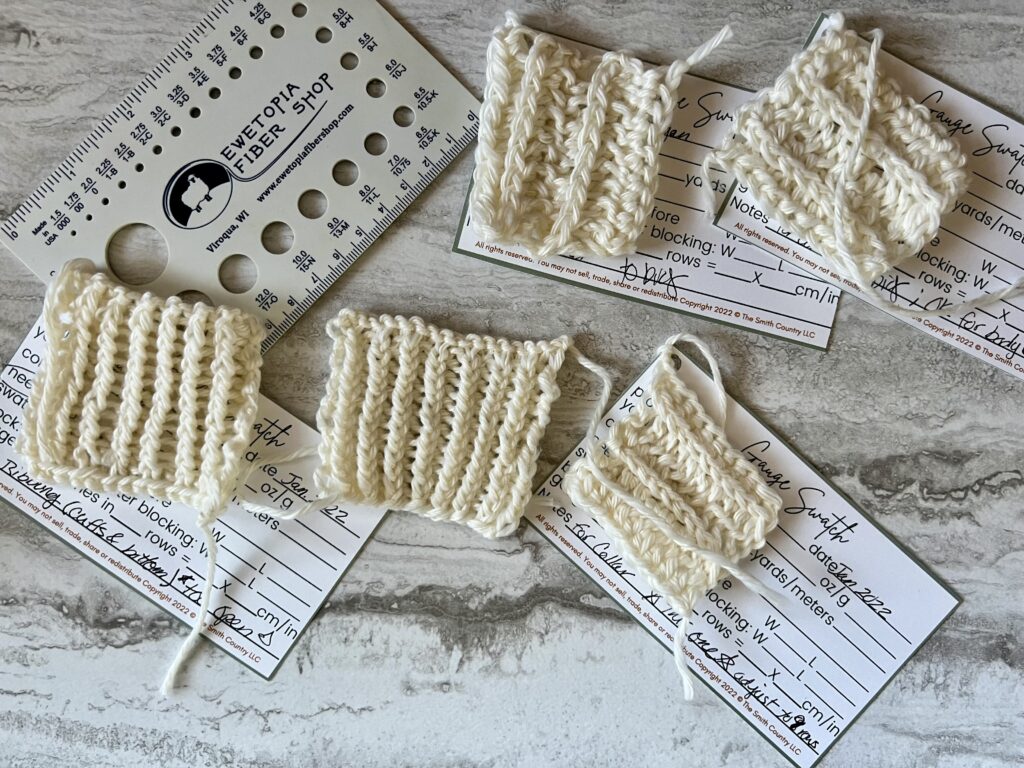
Or there is a free version in a business card size available as well.
Bottom ribbing
I used 48” long 4.0mm circular needles and started with casting on 240.
Then, I did a 1X1 twisted ribbing for 10 rows, I also slip the first stitch at the beginning of each row.
I definitely recommend going up a size if you use the hooks and yarn that I did. Only because it fits me, but it’s close. My size is right in between a small and a medium. So the small worked out for me and how I wear sweaters.

I also have longer arms and legs, so if I were to make it again, I would definitely add an extra 2 inches to the sleeves. the sleeves fit me, but I like mine a little longer. Thankfully there is a lot of stretch in this pattern.
If you have been wanting to try making your own sweater, or are looking for another super cute sweater, I highly recommend you give Stephanie’s design a try! She offers it free on her blog. The construction is easy, and for a sweater, it was actually a fairly quick whip-up! She also offers an inexpensive ad-free version (which I bought and LOVED) on both Etsy and LoveCrafts!
Want more Inspiration for outfits to wear with your new Cardi? Here are my Reels with 3 different outfit ideas!
- black polka-dot dress
- black leggings, a plaid shirt, long sleeve shirt
- jeans, and a T-shirt tucked in.
Want to remember this post? Pin it to your favorite Pinterest Board!


Photograph ©2022 Always Jenn Smith; Jenn Smith, LLC FKA Smith Country, LLC

