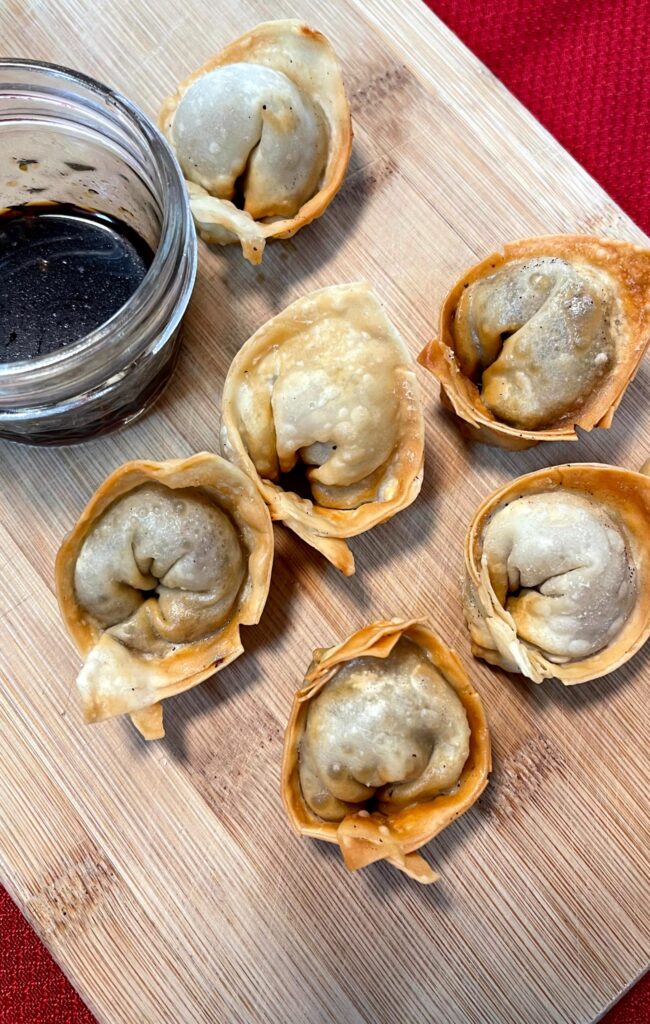
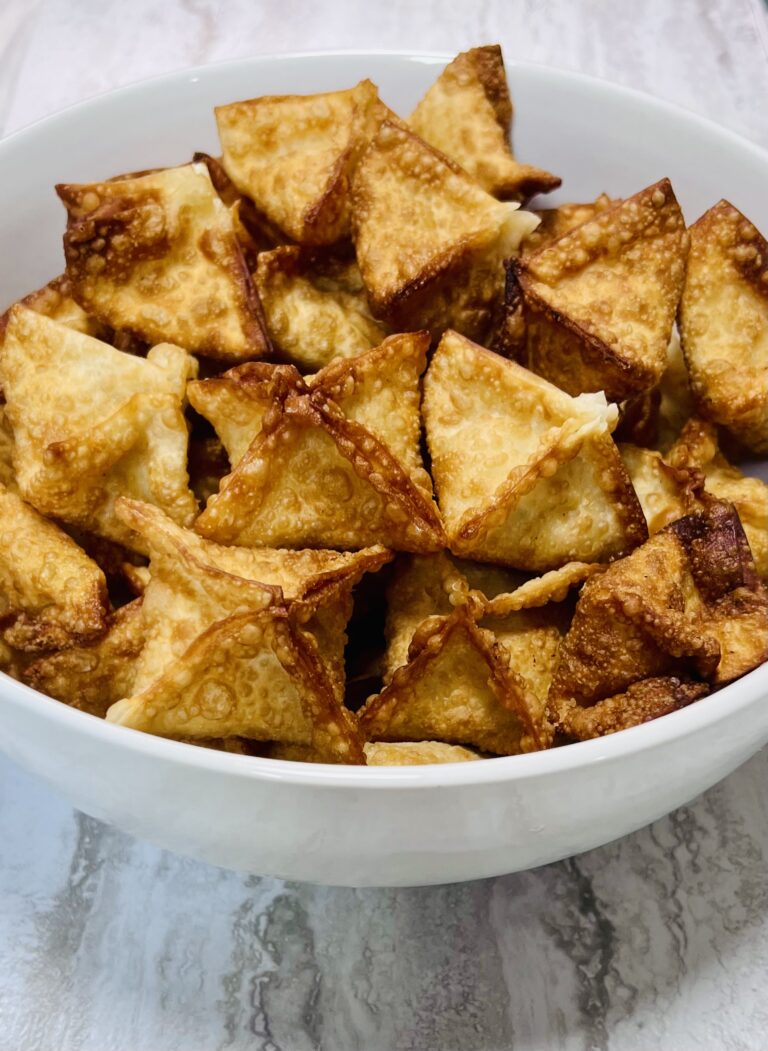
Fried Wonton (炸云吞)
This recipe is my version based on my dad’s original recipes he taught me when I was younger. I use my family’s technique of cooking the meat first to prevent the fried wrapper from getting soggy.
This post may contain affiliate links. That means I may make a small commission on items purchased through links in this post at no extra cost to you! Affiliate Disclaimer
This fried wonton recipe post may contain affiliate links. That means I may make a small commission on items purchased through links in this post at no extra cost to you! Affiliate Disclaimer
Today is the start of the Chinese Lunar New Year. The lunar calendar determines the date of the Chinese New Year for anyone who doesn’t know. The holiday falls on the second new moon after the winter solstice (Dec 21). That’s why, each year, the New Year in China falls on different dates between January 21 and February 20.
I honestly grew up in a very Americanized family setting. Any memories I have of The Lunar New Year stem from my grandparents. I would receive hongbao (red envelopes with lucky money) from my grandparents and we would talk on the phone with them (since we did not live close enough to have a reunion dinner with them) about the New Year, but also family and other family updates.
My memories of food with them are rooted in both traditional (Chinese and Singaporean) and Chinese American foods. My grandmother has always enjoyed a good cream cheese wonton (crab rangoon) and my grandfather enjoyed anything and everything fried, but I remember having steamed dumplings, fried rice, and many other foods too.
However, most of my food memories are with my parents, as I grew up in Wisconsin (most of my parents’ families are down south or in Singapore). At this time, most of my Lunar New Year experiences are a distant memory. As an adult, I try to share the small memories I have of the Lunar New Year with my children. Hopefully, I am instilling a little bit of that enjoyment and goodness in them that they can share with their children as well.
I learned how to make my version of this dish from my dad. Following my family’s cooking technique, I cook and drain the meat before wrapping it, to prevent the wrapper from becoming overly greasy and soggy.
The History of Fried Wontons
Wontons originate in China, dating back as far back as the Qing Dynasty (1644). Wonton soup was enjoyed by rich, upper-class families until after World War II when it became more widespread.
When Chinese nationals immigrated to the United States, they brought along this dish (and many others), opening up restaurants to offer and enjoy a taste of home in their new home. After the Chinese Exclusion Act was passed, many Chinese pivoted and decided to make Chinese food more accessible to Americans. Chinese chefs created fusion items that felt more familiar and acceptable to the American palate. This led to iterations including Crab Rangoon or Cheese Wonton (炸蟹角) and fried wontons (炸云吞).
Here’s the jist of how to make fried wontons
For the full recipe, keep scrolling down.
Step 1
Cook the pork in a pan on medium heat. Salt and pepper.
Step 2
Strain the meat in a bowl to get rid of the excess grease.
Step 3
As the meat is draining, place the pan back on the burner (set to medium-low this time), and add the green onion bottoms, and the remaining garlic. Cook until fragrant.
Step 4
Then, turn off the heat and re-add the cooked meat, soy, and Worcestershire Sauce.


I have my water to the right of the cutting board as well as the wrappers because I am right-handed.
Step 5
Using a teaspoon, dollop a small amount of filling onto the center of a wonton wrapper. Then take your finger and gently tap it into the water and wipe a small amount of the water onto each side of the wonton wrapper (dip your finger as many times as needed to get all sides damp). Slide through the image slider below for details.


Step 6
Then, fold the sides together in your choice of shape folding (see images below for different fold options.
Wonton Shapes and folding instructions
One of my favorite things about wontons is that there are options for folding them. Try each of these versions and see which one you like best!
Square Gift Shape

After wetting all sides of the wrapper:


Now, press all sides together creating a box.


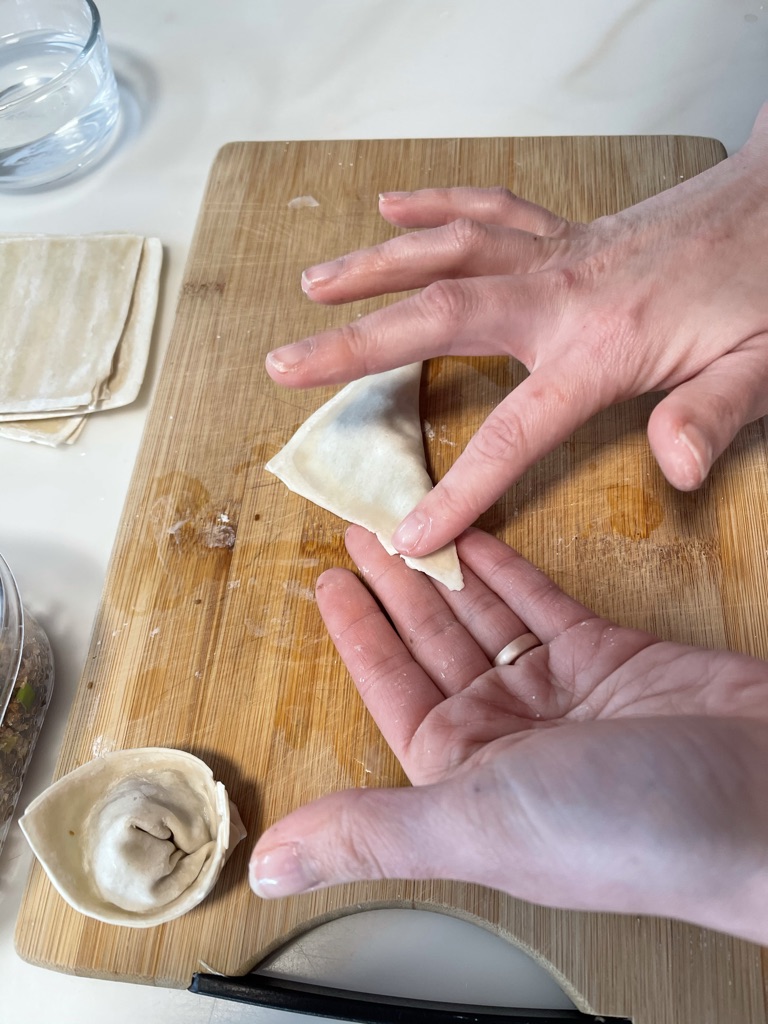
Triangle

This one is pretty self-explanatory, but I like to start at the “top of the triangle. Take one corner, bring it together, with the other corner on the exact opposite side, and press together. Then press down the sides, making sure to press the air out as you go.


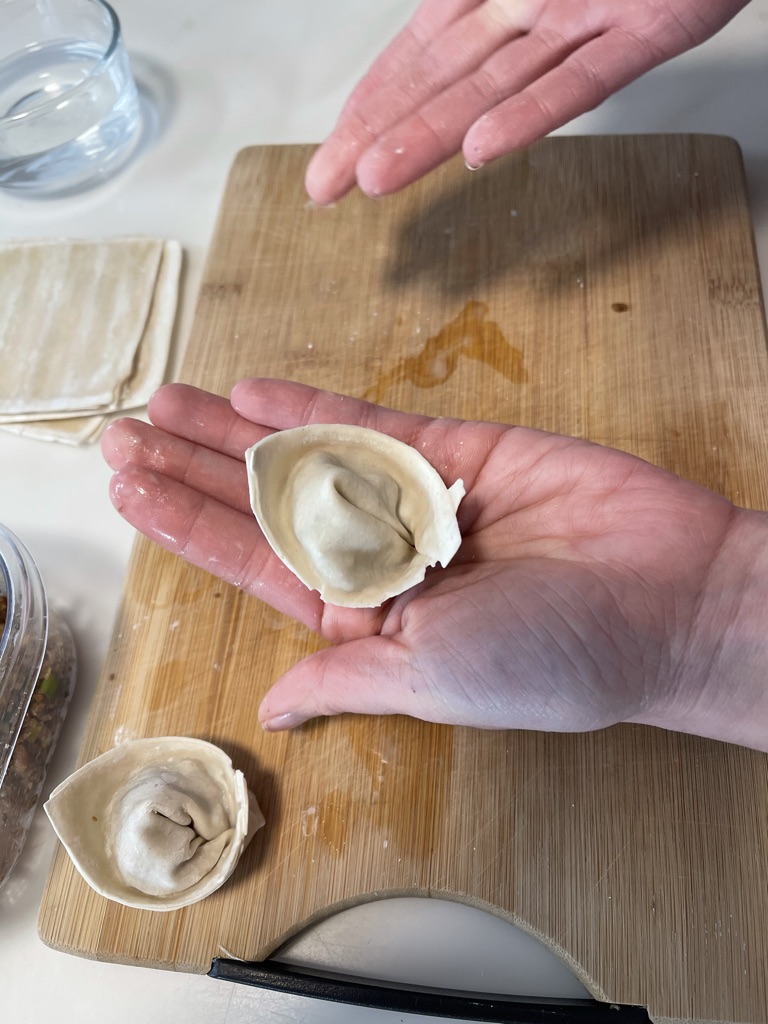
Circle/Wrap
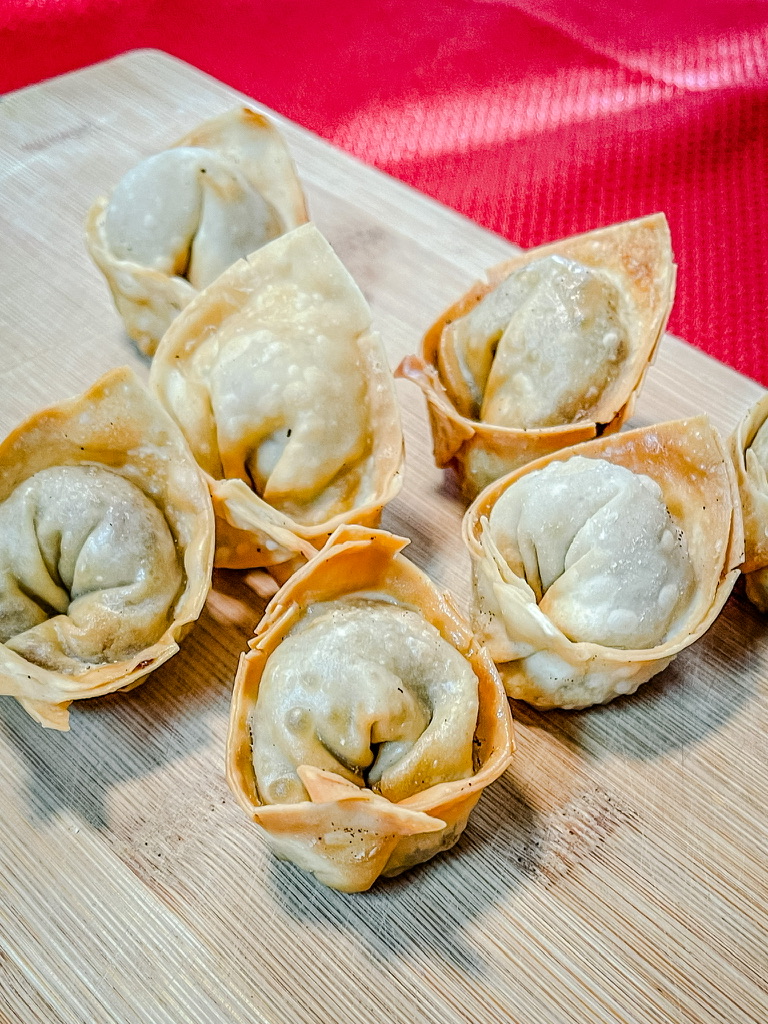
To make the circle style (which I think looks like a crown), you start with the triangle shape. Then you wet the bottom corners of the triangle.


Step 7
You’ll want to make these in batches that will fit in a single layer in your fryer. I like to make mine in batches of 6-8, then fry those, take them out, then make 6-8 more. If you make them too far ahead of time, the filling may leak through the bottom.


If you need more details on frying, check out my blog post “What Type of Pan Should I Use for Frying?“
Step 8
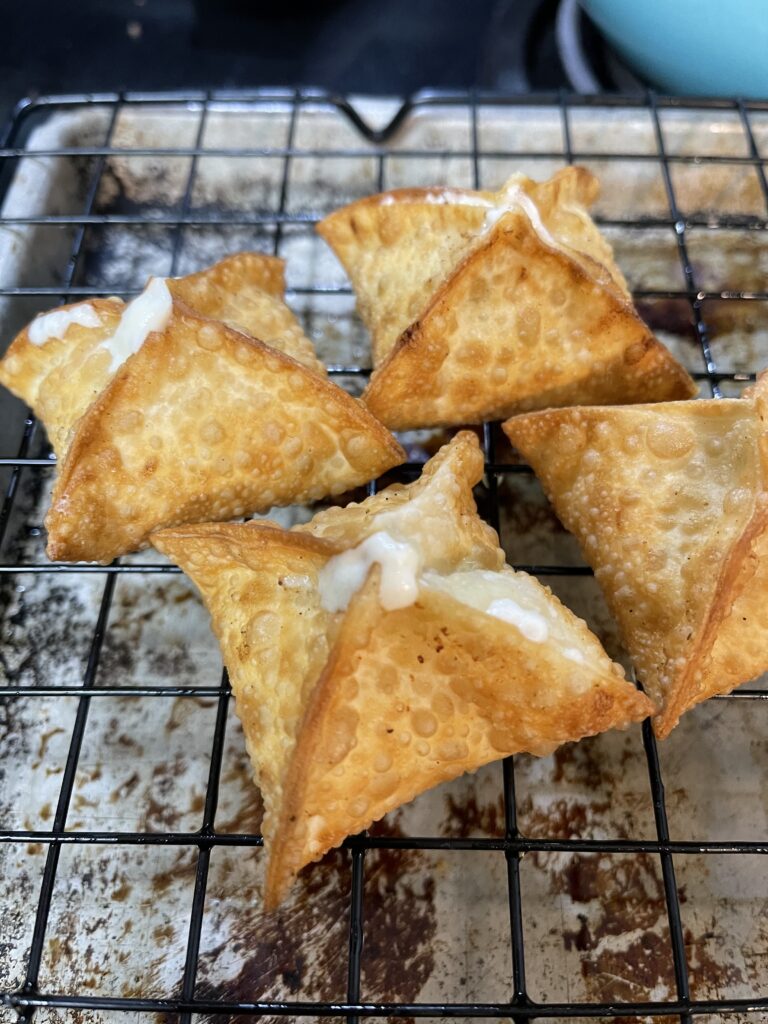
You will need to watch them closely as they cook, they don’t take long, and you will need to flip them so they are golden and crunchy on all sides.
Even the square ones need to be flipped or held down for a few seconds to get golden brown.
Once golden brown, remove and lay on a rack to “dry”.
FYI…
This is a great opportunity to get your older kids (or friends, spouse, roommate, etc) to help. I usually have my tween son help with this, while I do the frying. It makes quick work of the process and he actually has fun making the shapes.
Step 9
For best results, serve immediately with soy sauce or your fav sauce.
That’s it!
Did you try it, have questions?
I value your opinion and would love to hear your feedback! Kindly leave your thoughts in the comments section and rate this recipe using the star icons on the recipe card. It is truly appreciated and helps me out tremendously with this and future recipes.
Let’s get social!
Don’t forget to tag me on Instagram or Facebook, @jenngiamsmith #JennGiamSmith I will always share your posts on my stories and tag you! You can also share it on this post’s Pinterest Pin! Don’t forget to follow me on Pinterest for a steady stream of recipe (and other) inspiration!
It’s always wonderful to see loved ones coming together over delicious food.
Need other recipe ideas to make your New Year’s fun and maybe even different? Try these:
I wish you all good fortune according to your wishes!
Happy New Year
新年好
Xīnnián hǎo


Fried Wontons
Indulge in the heavenly goodness of these ground pork wontons. Succulent ground pork nestled in delicate and crispy golden-brown wonton wrappers makes for a perfectly delectable appetizer that is sure to impress your guests!
- Total Time: 50 minutes
- Yield: 40 wontons 1x
Ingredients
- 1 [12 oz package] wonton wrappers
- 1/2 bunch green onions (bottoms ONLY chopped)
- 1 garlic clove (chopped and smashed)
- 1 lb ground sausage
- 2 teaspoons soy sauce
- 2 teaspoons Worcestershire Sauce
- 1/4 cup warm water
- salt
- pepper
- Oil for frying
Instructions
- Cook the pork in a pan on medium heat. Salt and pepper.
- Once fully cooked, strain the meat in a bowl to get rid of the excess grease.
- As the meat is draining, place the pan back on the burner (set to medium-low this time), add the green onion bottoms, and the garlic. Cook until fragrant.
- Turn off the heat and re-add the cooked meat, soy, and Worcestershire Sauce.
- Pour into a bowl and let cool to room temp.
- Using a teaspoon, place a small amount of filling onto the center of a wonton wrapper.
- Take your finger and gently tap it into the water and wipe a small amount of the water onto each side of the wonton wrapper (dip your finger as many times as needed to get all sides damp).
- Fold the sides together in your choice of shape folding (see images on Blog Post). Make in batches that will fit in a single layer in your fryer (approximately 6-8 of them). If you make them too far ahead of time, the filling may leak through the bottom.
- Watching closely, fry in single layers, flip them so they are golden and crunchy on all sides. Even the square ones need to be flipped or held down for a few seconds to get golden brown.
- Once golden brown, remove and lay on a rack to “dry”.
- For best results, serve immediately with soy sauce or your fav sauce.
- Prep Time: 20 minutes
- Cook Time: 30 minutes
- Category: Appetizer
- Cuisine: Chinese American
Nutrition
- Calories: 60
- Sugar: 0.04
- Sodium: 142
- Fat: 3
- Saturated Fat: 1
- Carbohydrates: 5
- Fiber: 0.2
- Protein: 3
- Cholesterol: 9
Nutritional Facts:
The numbers above are based on the serving size stated. All are estimates and you should not rely on this information as a substitute for, nor does it replace professional medical advice, diagnosis, or treatment. If you have any concerns or questions about your health, you should always consult with a physician or other healthcare professional.
Want to remember this post?
Pin it to your favorite Pinterest Board!


Photo, Prop Styling, and Food Styling by Jenn Smith © 2021 Always Jenn Smith; Jenn Smith, LLC
This Blog Post is © 2021 Always Jenn Smith™; Jenn Smith, LLC (FKA Smith Country, LLC) See below for details
Please Be Respectful
All rights reserved. You may NOT sell, trade, share or redistribute this fried pork wonton recipe in any way or use any of my photographs for your site. If you are linking back to this post to a list of recipes, giving credit for the recipe to myself and my site, you may use ONE photo. You must site me and my blog as the recipe creator and give credit for the photo. ©2021 Always Jenn Smith; Jenn Smith, LLC
Jenn Smith of Always Jenn Smith™; Jenn Smith, LLC participates in the Amazon Services LLC Associates Program, an affiliate advertising program designed to provide a means for sites to earn advertising fees by advertising and linking to amazon.com. As well as the Apple affiliate program now called the Performance Partners Program.
This site displays third-party ads and contains affiliate links, See terms and conditions for ALL affiliates.
If you have any questions feel free to comment below or e-mail me directly.
Thank you for visiting!

